
Purpose
View or edit a Security Group in the Cantara Administration Console. From the Security Group profile, you can update the description, manage Security Topics, and add or remove members.
Before you begin
-
You have access to the Cantara Administration Console.
-
You have permission to view Security Groups.
Procedure
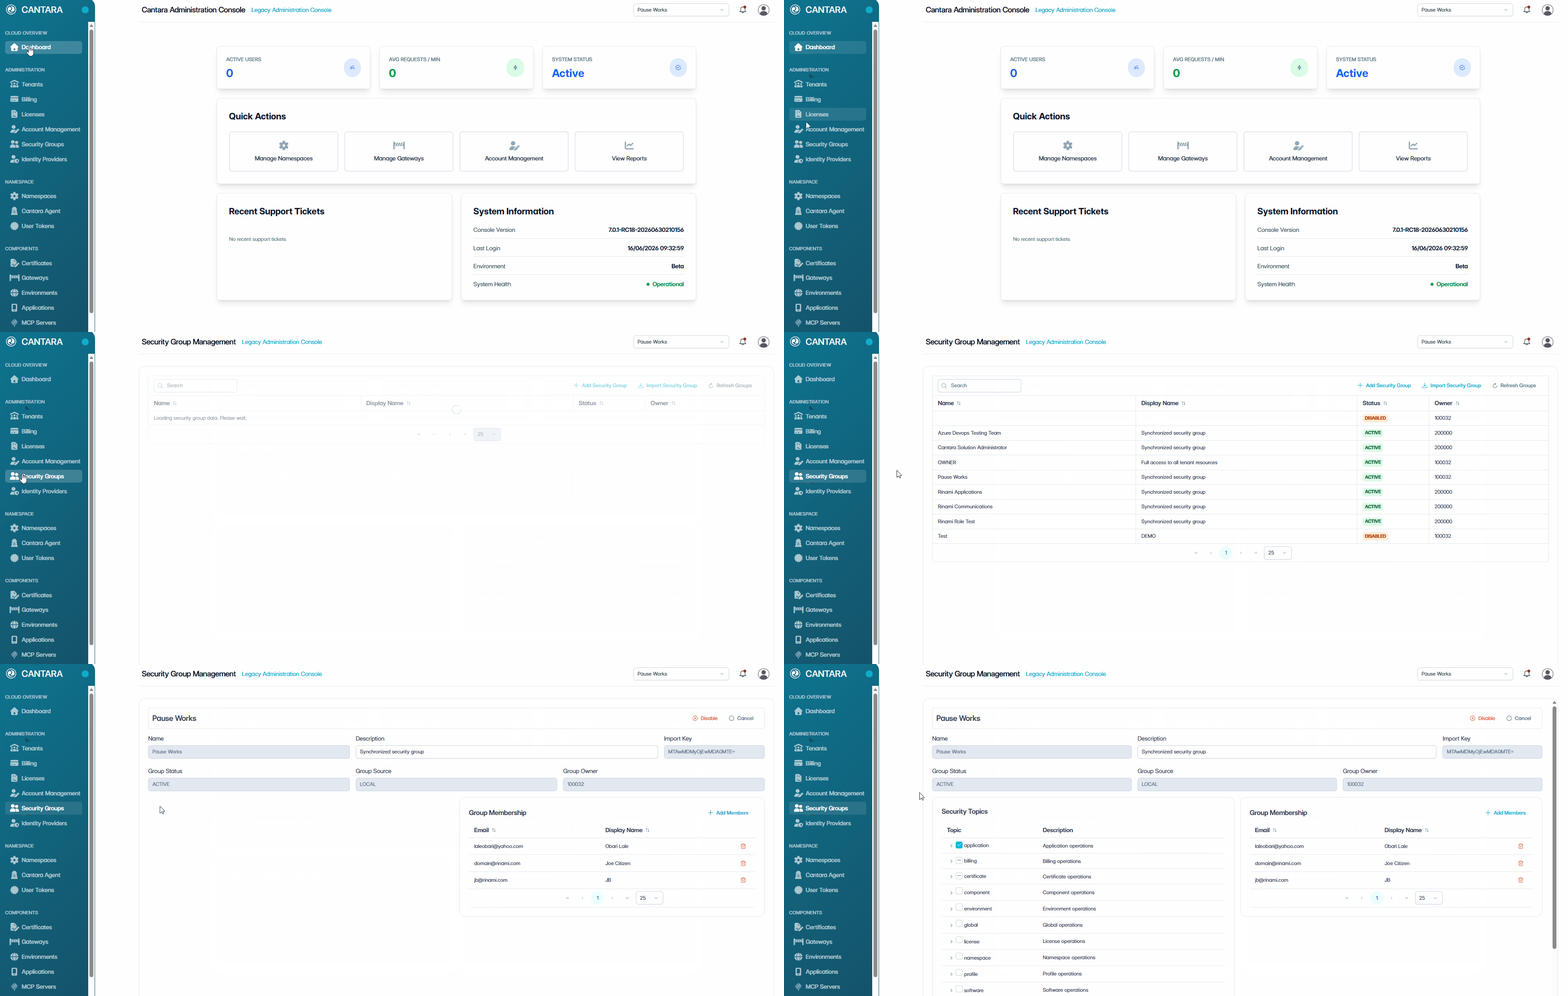
To view or edit a Security Group:
-
Navigate to Security Groups.
-
Select the Security Group you want to view or edit.
The profile page for the selected Security Group is displayed with the following fields:
|
Field |
Description |
|---|---|
|
Name |
The name assigned to the Security Group. (read only) |
|
Description |
A brief summary of the purpose or scope of the Security Group. |
|
Import Key |
A unique identifier used to reference the Security Group when importing it to another tenant. (read only) |
|
Group Status |
The current status of the Security Group: New, Active or Disabled. (read only) |
|
Group Source |
Indicates whether the group is managed locally or externally via SCIM. Defaults to LOCAL. (read only) |
|
Group Owner |
The user responsible for managing the Security Group. (read only) |
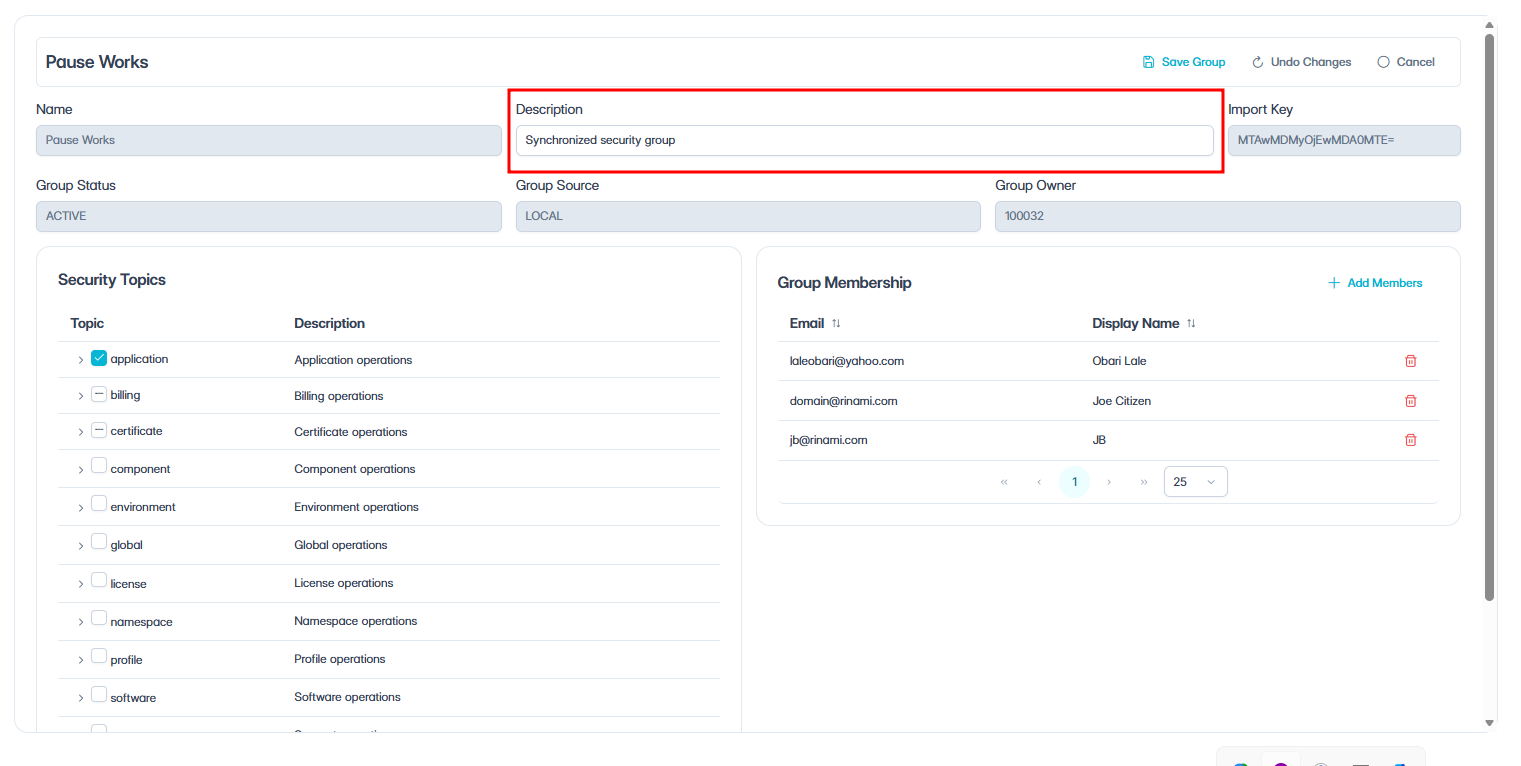
Edit the Description
-
Update the Description field as required.
-
Select one of the following actions:
-
Save — Apply and save any updates made.
-
Undo Changes — Revert any unsaved changes back to the last saved state.
-
Cancel — Exit without saving.
-
Manage Security Topics
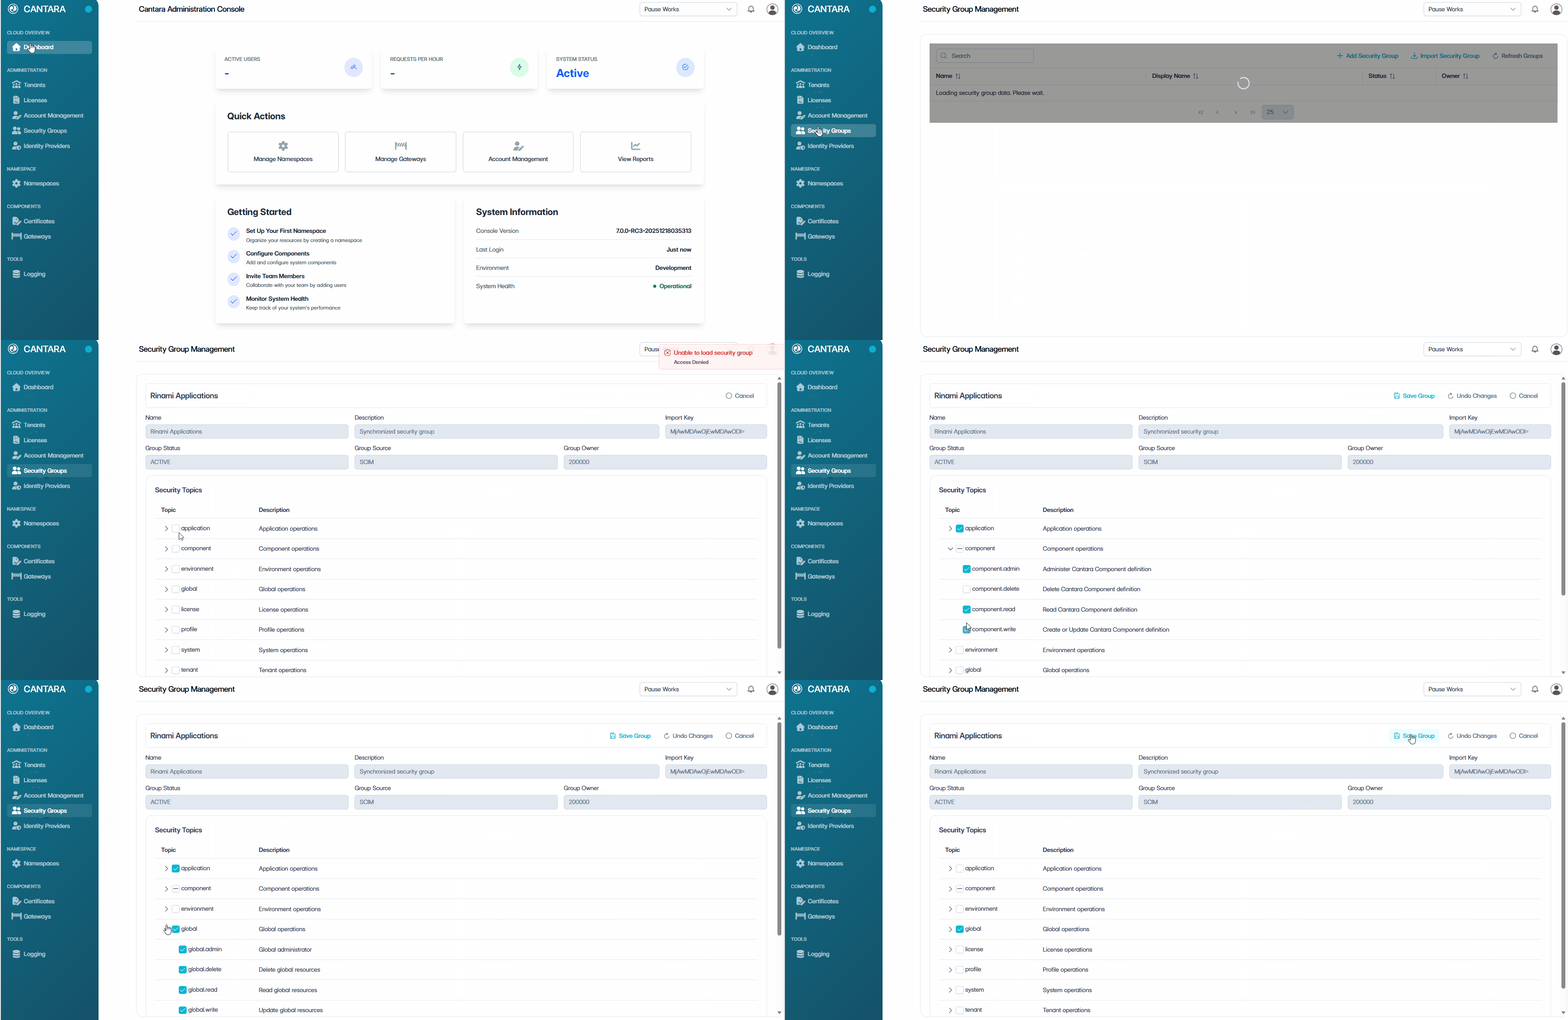
Security Topics define the functional areas of the system that a Security Group can access. Each Security Topic contains individual Permissions for more granular control.
-
In the Security Topics section, select or deselect Security Topics to manage access for the group:
-
Select a Security Topic to grant full access to that functional area, or deselect it to remove access.
-
Alternatively, expand a Security Topic (›) to view Permissions.
-
Select or deselect individual Permissions for granular control.
-
Repeat for additional Topics as required.
-
-
Select one of the following actions:
-
Save Group — Apply and save the updated Security Group.
-
Undo Changes — Revert any unsaved changes back to the last saved state.
-
Cancel — Exit without saving and return to the previous screen.
-
Changes to Security Topics take effect immediately for all members of the Security Group.
Add a Member
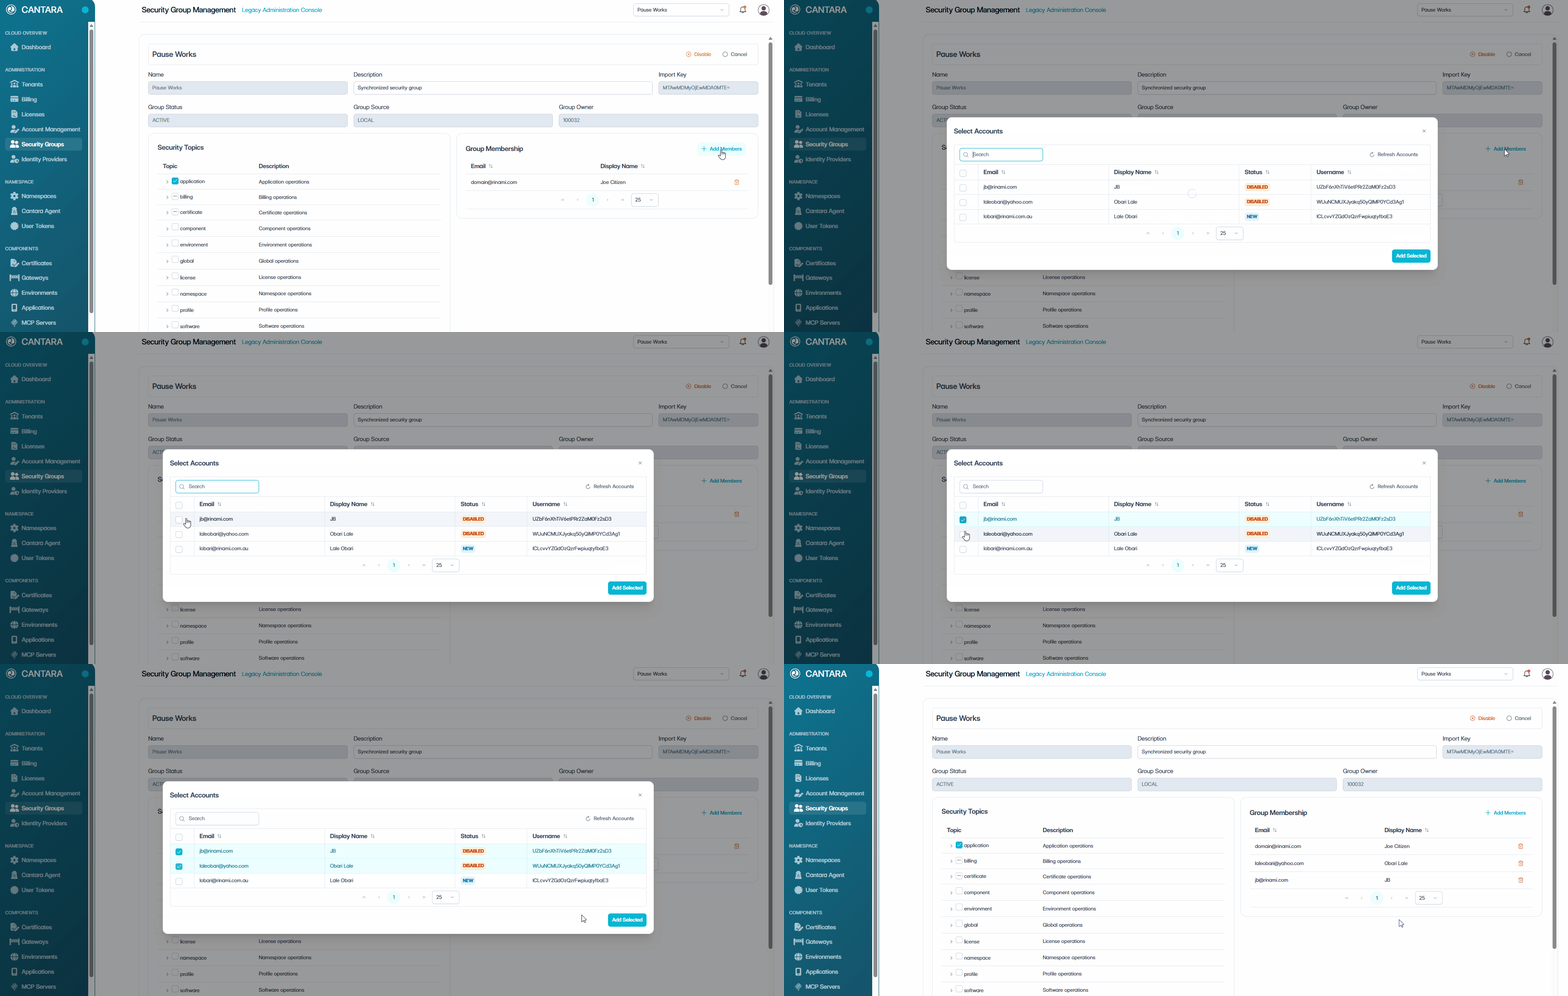
-
In the Group Membership section, select Add Member.
-
Select the user accounts you want to add.
-
Select Add Selected.
The selected users now appear in the Group Membership list. They inherit the permissions associated with the Security Topics assigned to this group.
Remove a Member
.png?cb=e1a62da711e62352d7d5586d10dbd991)
-
In the Group Membership section, select the remove (bin) icon next to the user.
-
Select Remove Selected to confirm.
The user immediately loses all permissions inherited from this Security Group. If the user belongs to other Security Groups, those permissions are not affected.