
Procedure:
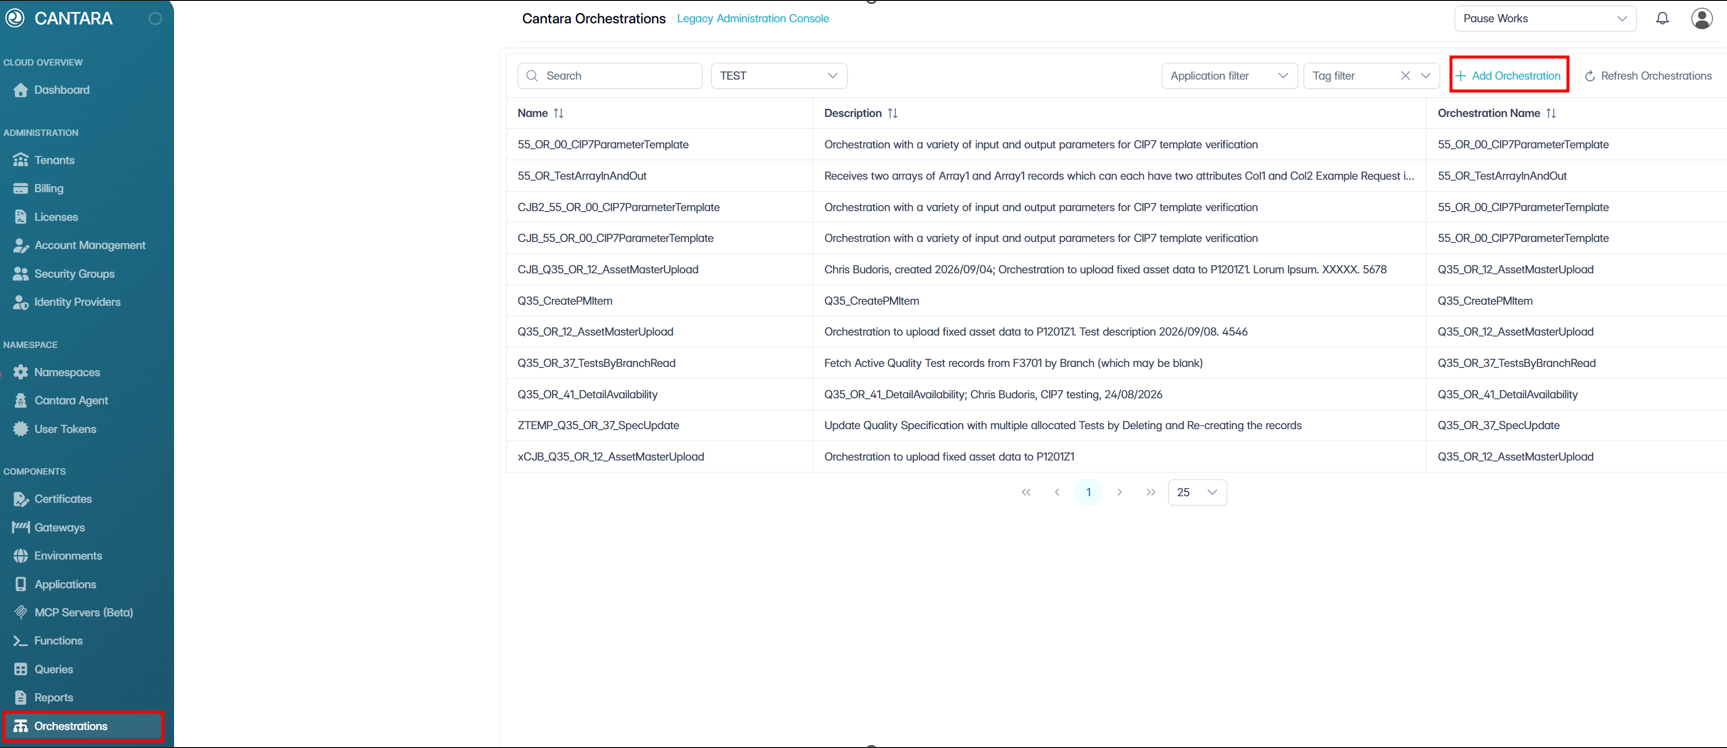
To create an orchestration:
-
Navigate to Orchestrations.
A list of available orchestrations is displayed.
-
Click + Add Orchestration.
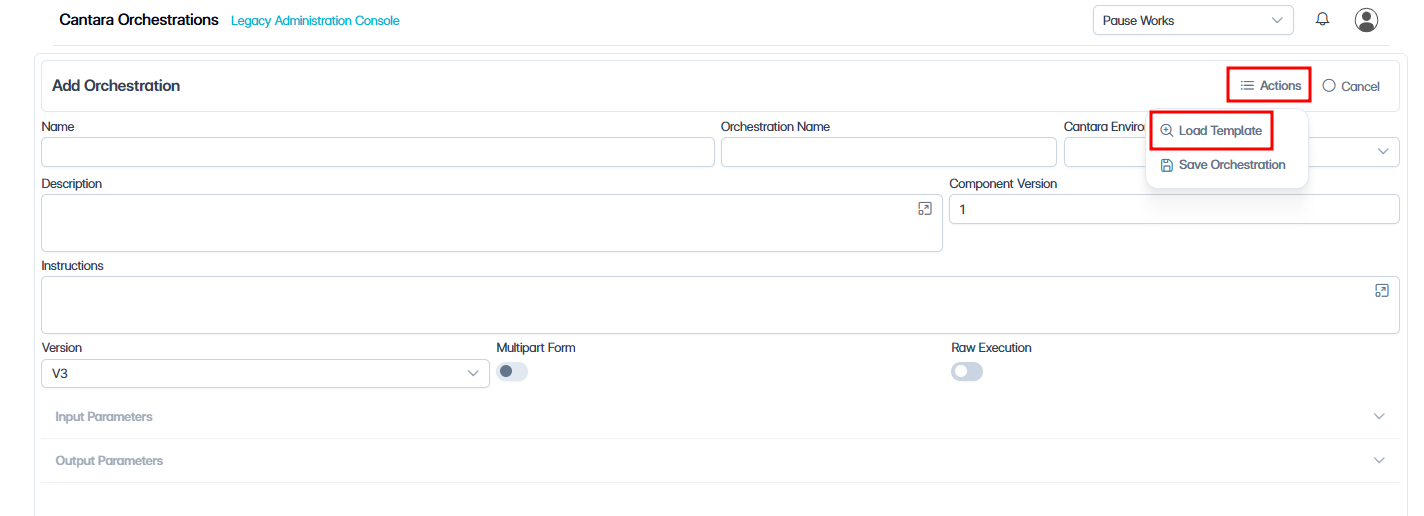
The orchestration settings screen is displayed.
-
Enter the Orchestration Name. This is the name of the orchestration as it appears in Orchestrator Studio.
-
Under Actions, select Load Template to load the orchestration parameters.
If prompted, enter your JDE login credentials.
-
Enter the following details:
-
Name: The name you want to assign to the orchestration. You can enter the exact name of the JDE orchestration or create one that is more meaningful to you. The value for this field can be a maximum of 40 characters (no spaces). Valid characters include numbers, letters, underscore (_) and dash (-).
-
The Cantara Environment will default in, or you may choose another one.
-
Select the Applications that will use this orchestration (to support application-based filtering).
-
Description: The description from Orchestrator Studio will default in. You can keep this, or update it with other meaningful information like audit data. An AI agent will not have access to information entered here.
-
The Instructions window will default to blank, but can be used to enter information to assist an AI Agent with processing the orchestration.
-
Component Version: Reference version for the service definition to assist with change control.
-
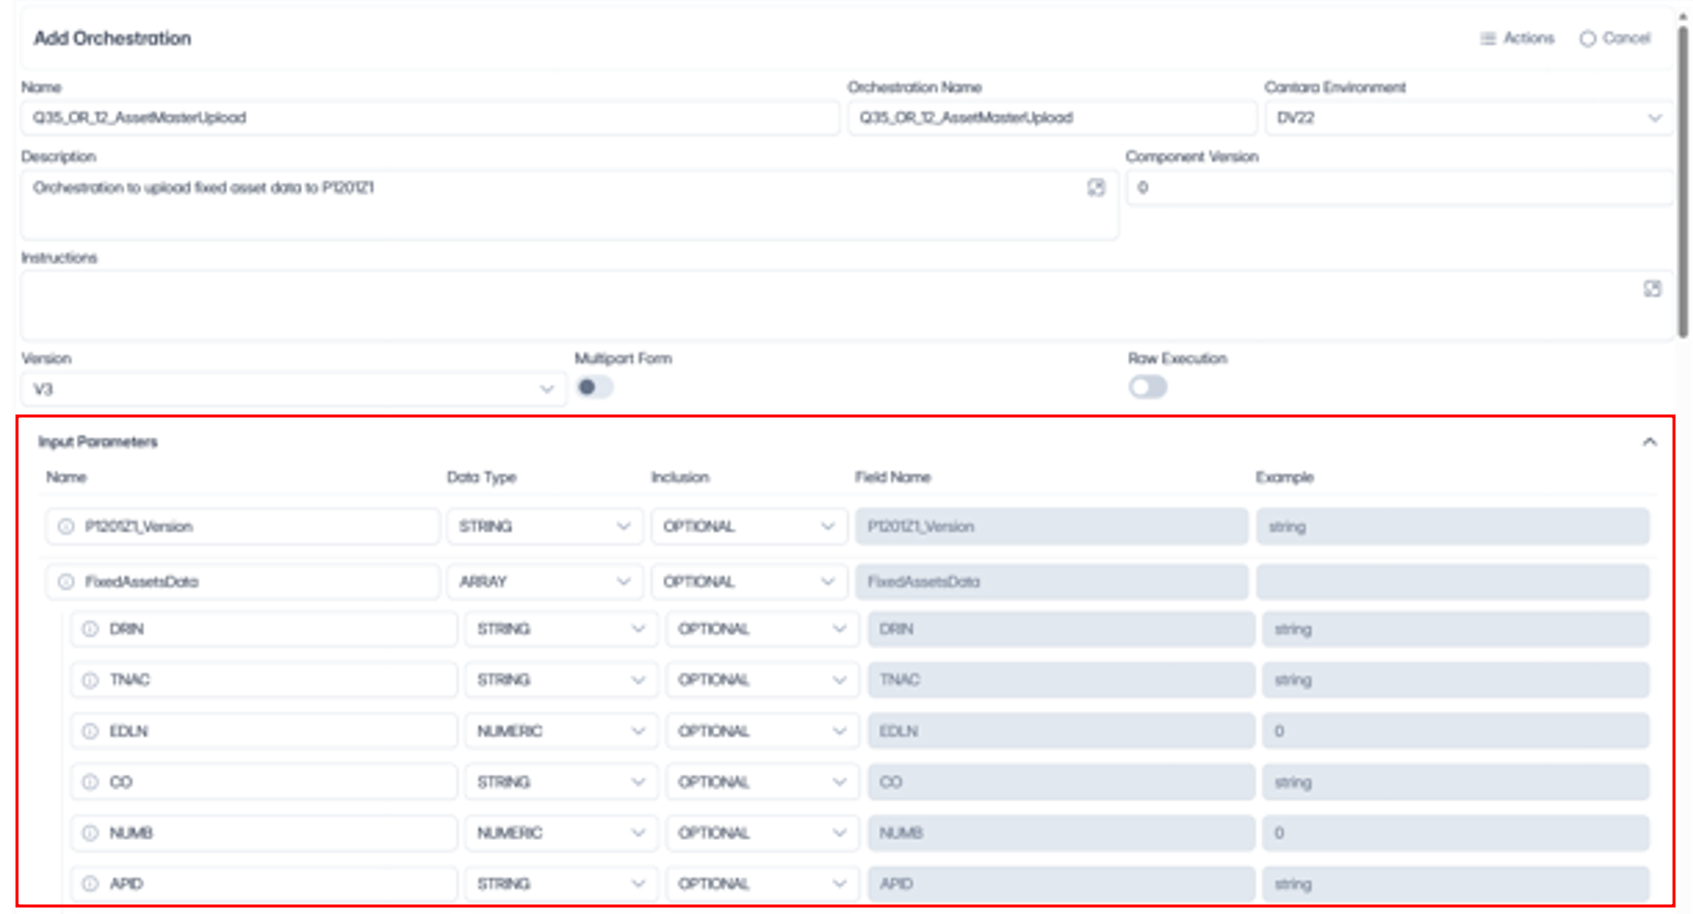
Expand the Input Parameters option to reveal input parameters for the orchestration.
-
The Name, Data Type and Inclusion will be defaulted in from Orchestrator Studio. These can be adjusted as needed.

-
Next to each parameter is the circle icon with a lower case ‘i’; clicking this opens up a Description window for each parameter. Instructional text can be entered here to assist an AI agent with processing.
-
Click Save.