You can manage the user accounts that have access to the Cantara Access Server.
Adding a New Proxy Group
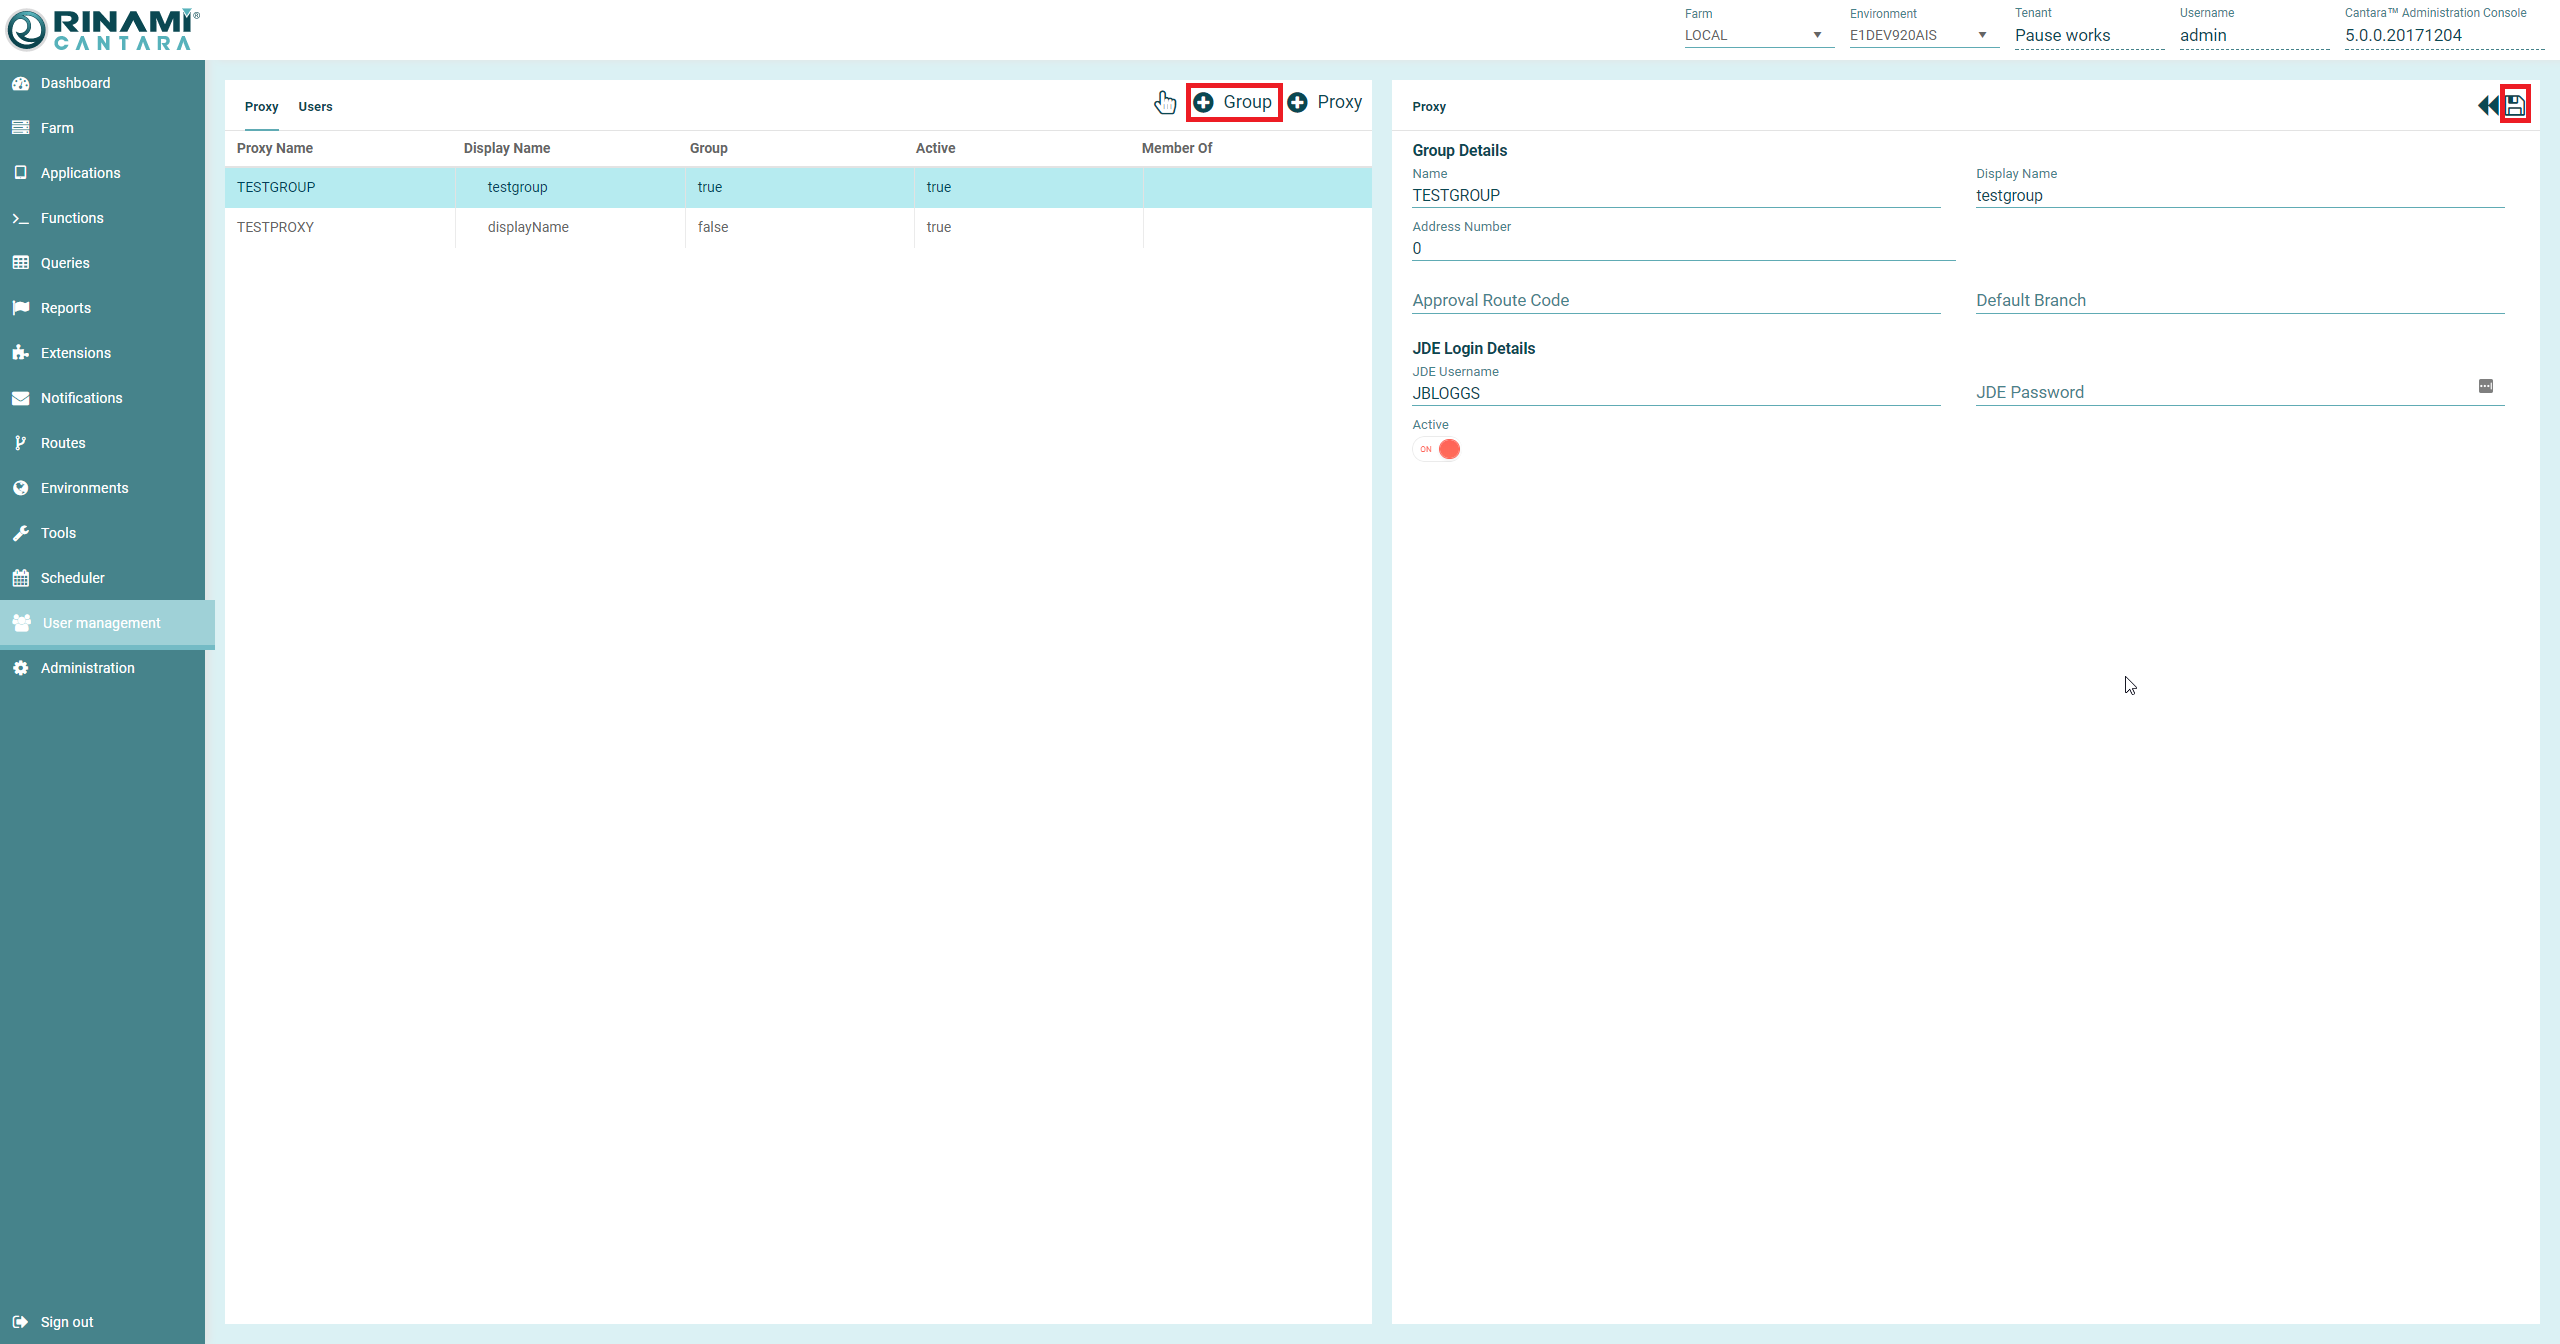
To add a new Group
-
Select the User Management node in the navigation panel, and select Proxy.
-
Click the Add Group (plus) icon.
-
Enter the Group Name.
-
Enter the Display Name.
-
Enter the JDE Address Number.
-
Enter the JDE Approval Route Code.
-
Enter the JDE Default Branch.
-
Enter the JDE Username.
-
Enter the JDE Password.
-
Set the group to ON if you want to activate the proxy group.
-
Click the Save Group button to save the proxy group configuration.
Adding a New Proxy User
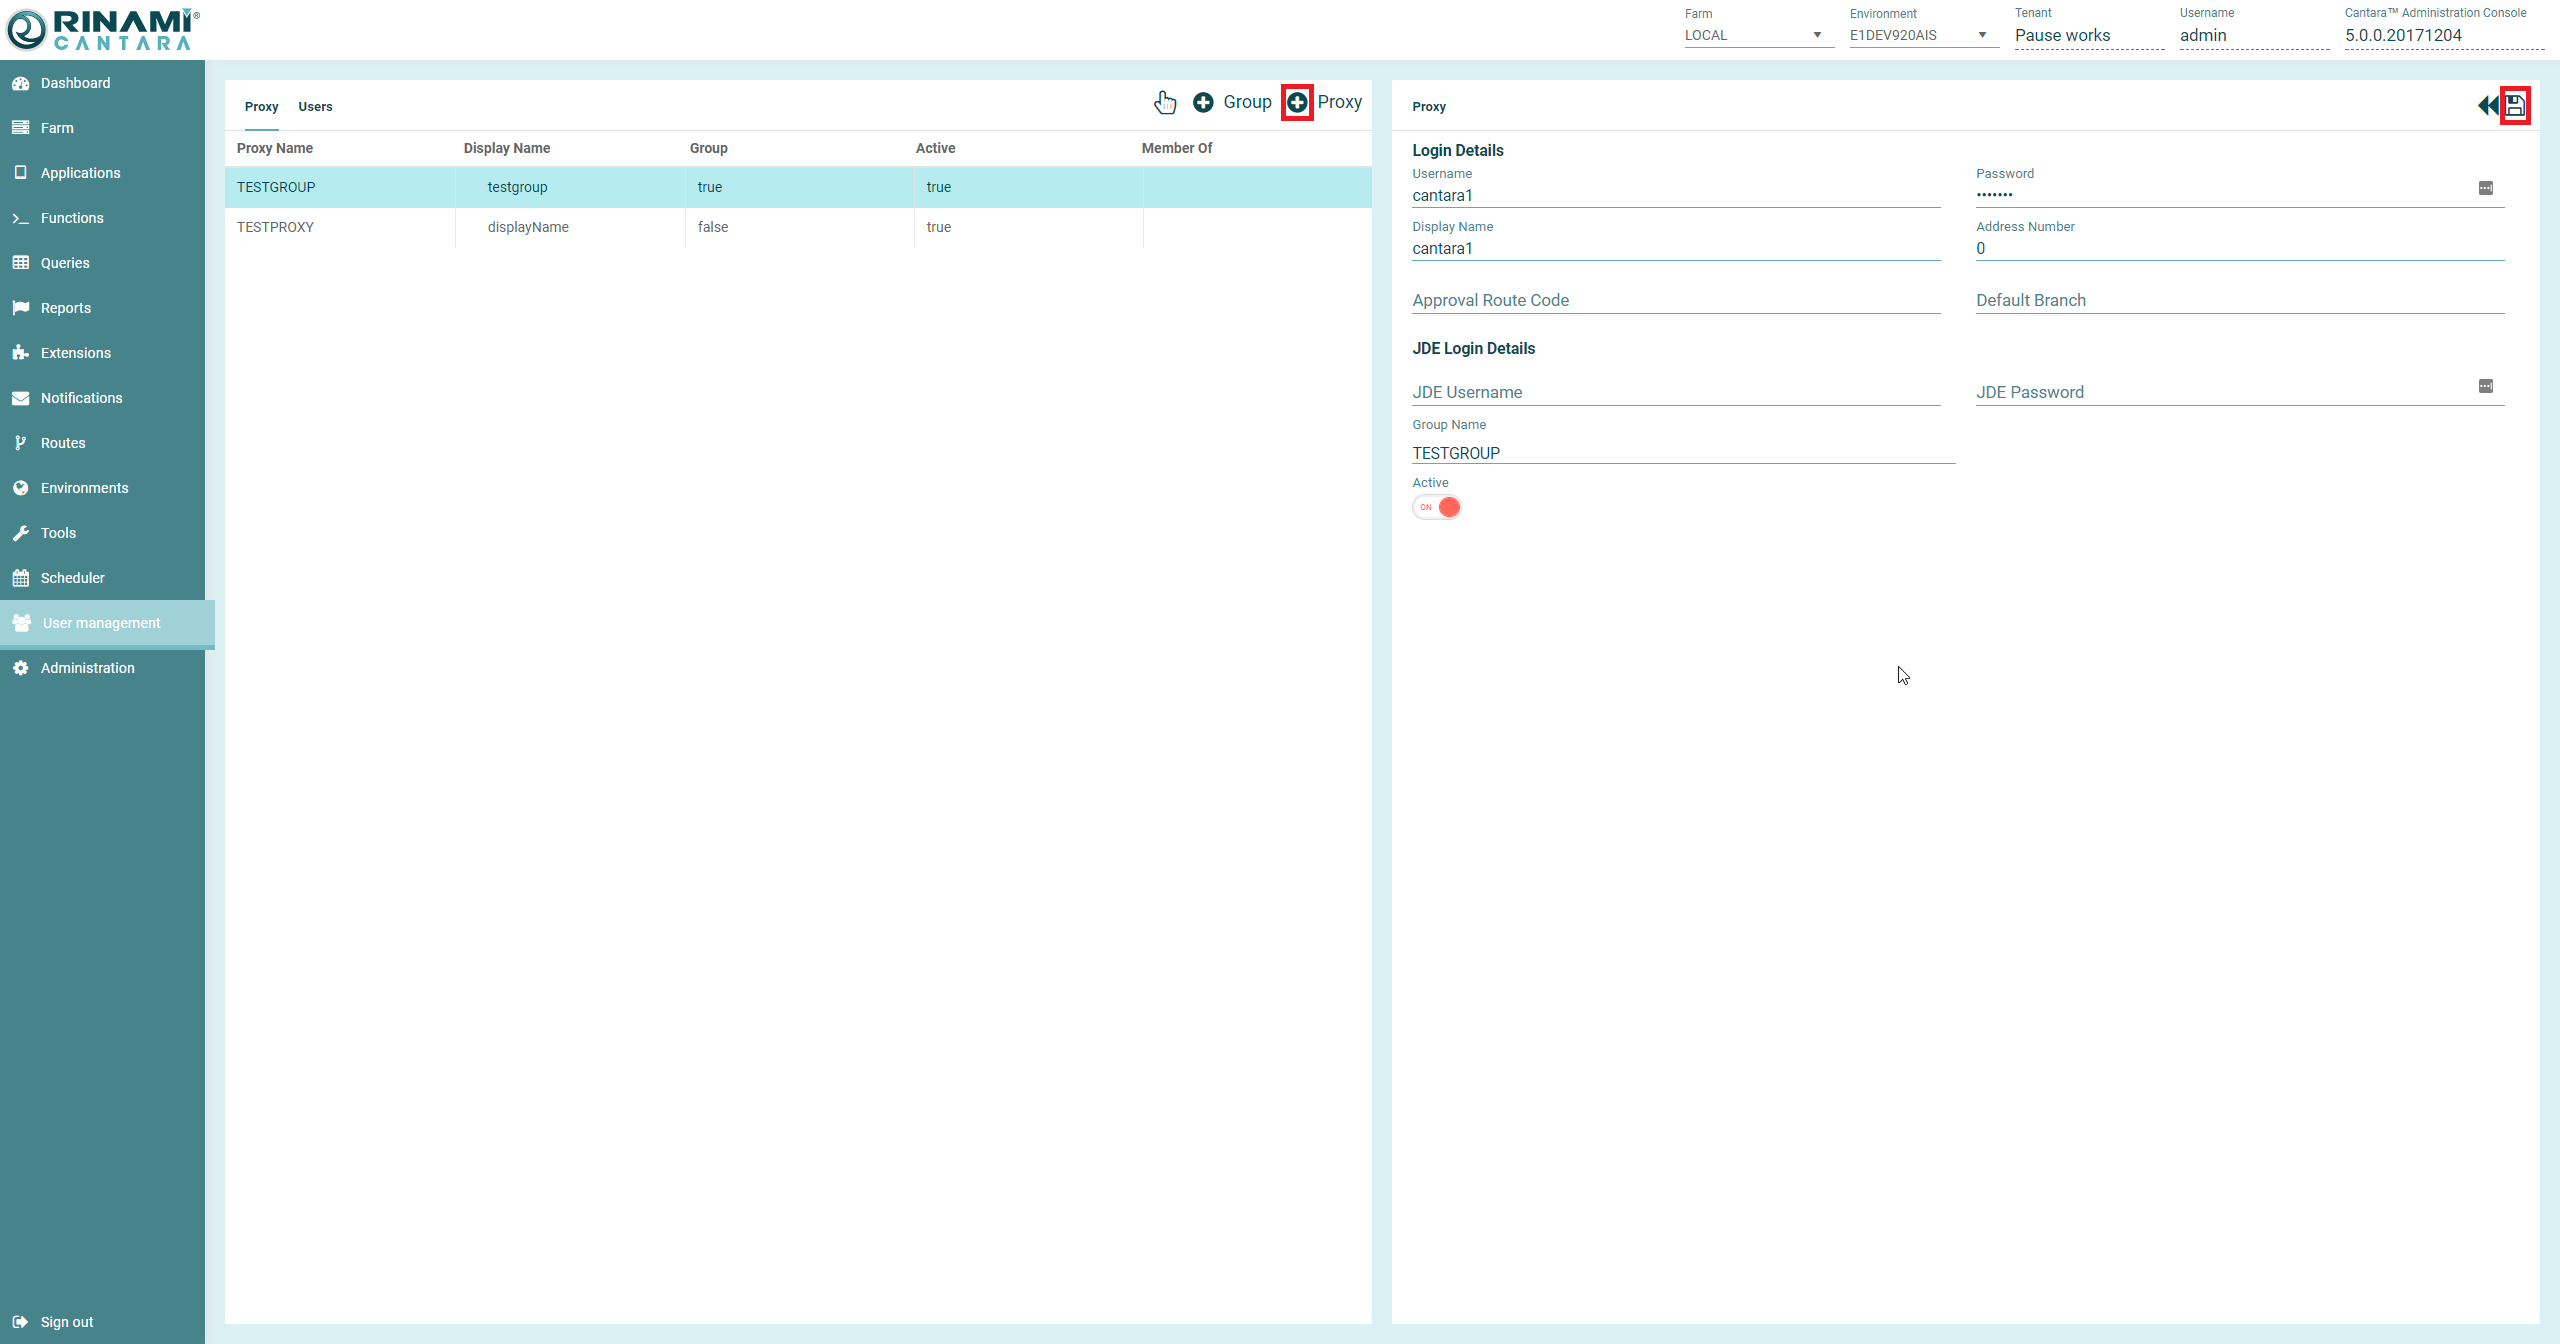
To add a new User
-
Select the User Management node in the navigation panel, and select Proxy.
-
Click the Add Proxy(plus) icon.
-
Enter the Username.
-
Enter the Password.
-
Enter the Display Name.
-
Enter the JDE Address Number.
-
Enter the JDE Approval Route Code.
-
Enter the JDE Default Branch.
-
Enter the JDE Username.
-
Enter the JDE Password.
-
If you want this user to belongs to a specific group, enter the Group Name.
-
Set the user to ON if you want to activate the proxy user.
-
Click the Save User button to save the proxy user configuration.
Deleting a Proxy Group or User
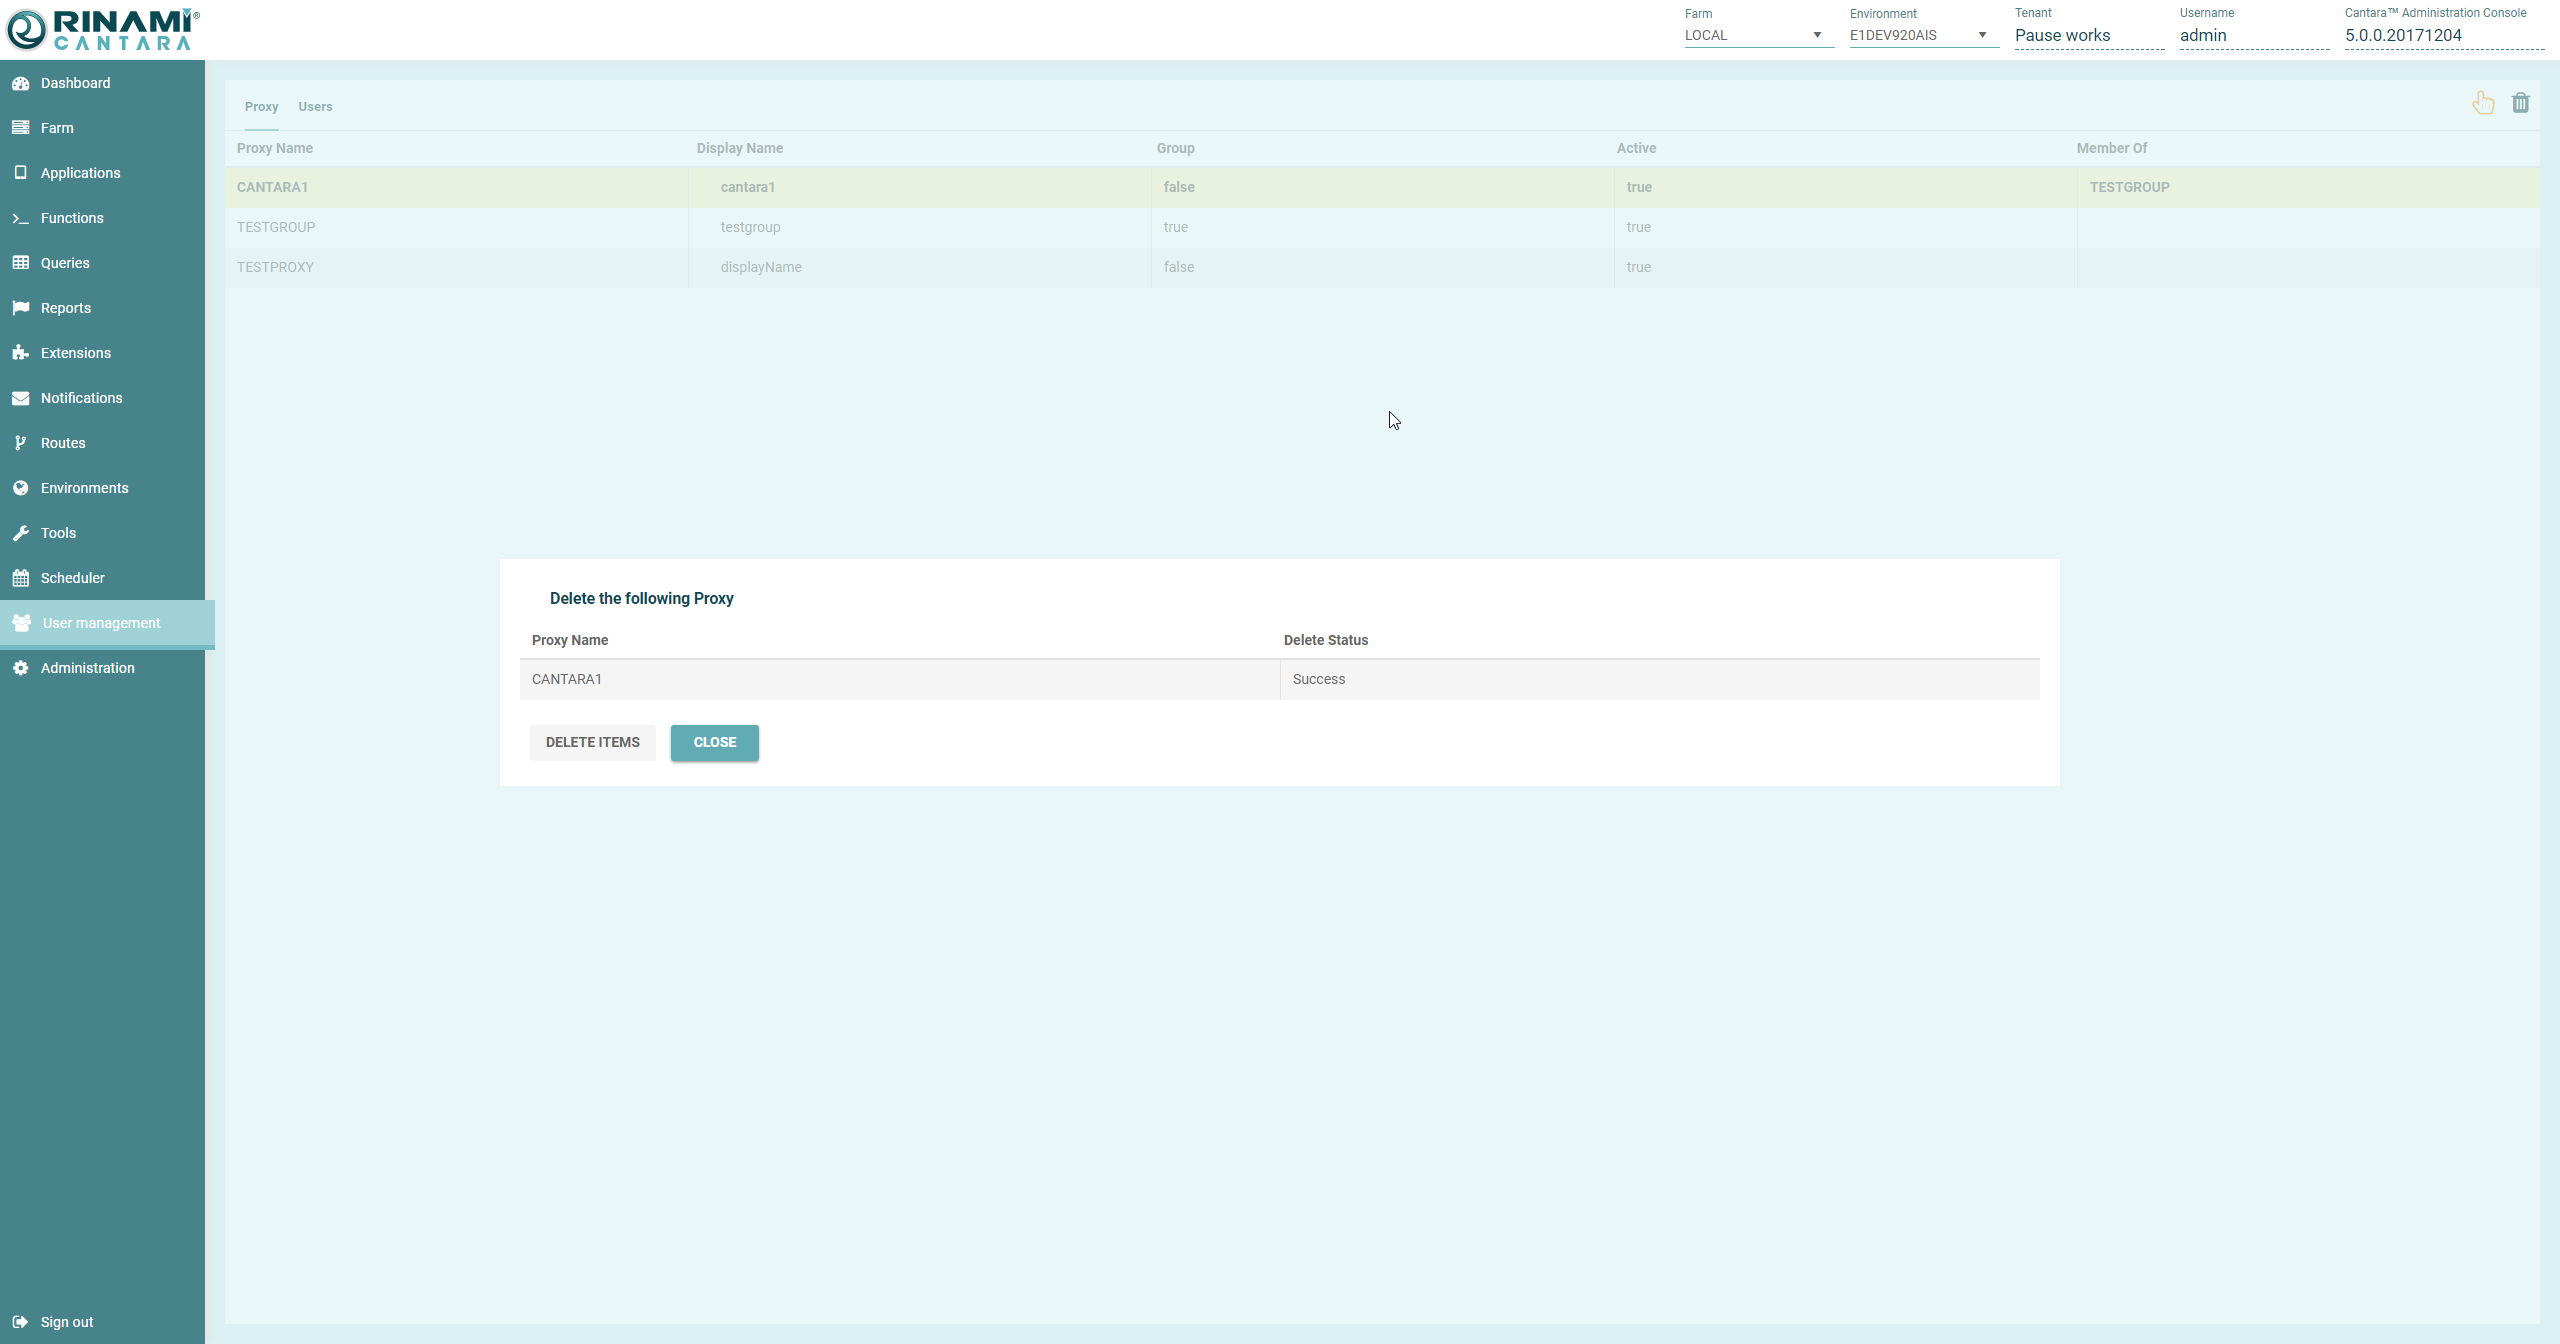
To delete a proxy group or user
-
Select the User Management node in the navigation panel, and select Proxy.
-
Click the Select List Item button (Hand) icon in the top right corner of the pane.
-
Select the line(s) that you wish to delete, they will highlight in yellow.
-
Click the (Trash Can) icon in the top right corner of the screen.
-
The Delete Proxy dialog box will appear.
-
Press Delete Items to confirm the deletion.
-
Once deleted the delete status will read as "Success"
-
Click the Close button to return to the User list.