Purpose
Guide administrators through configuring SCIM provisioning to automatically sync user accounts and groups from an Identity Provider into Cantara. If your Identity Provider supports SCIM, you can enable automatic provisioning so that user accounts and group memberships are managed in the IdP and synced into Cantara. SCIM is optional and does not affect user authentication.
Before you begin
-
You have access to the Cantara Administration Console.
-
You have permission to manage tenants and provisioning tokens.
-
You have access to your IdP administration console.
-
An IdP is configured for your tenant.
Procedure
Step 1: Generate a SCIM Provisioning Token in Cantara
To generate a SCIM provisioning token:
-
In Cantara, navigate to Tenants.
The Tenant Management screen displays a list of all existing Tenants.
-
Select the tenant you want to edit.
-
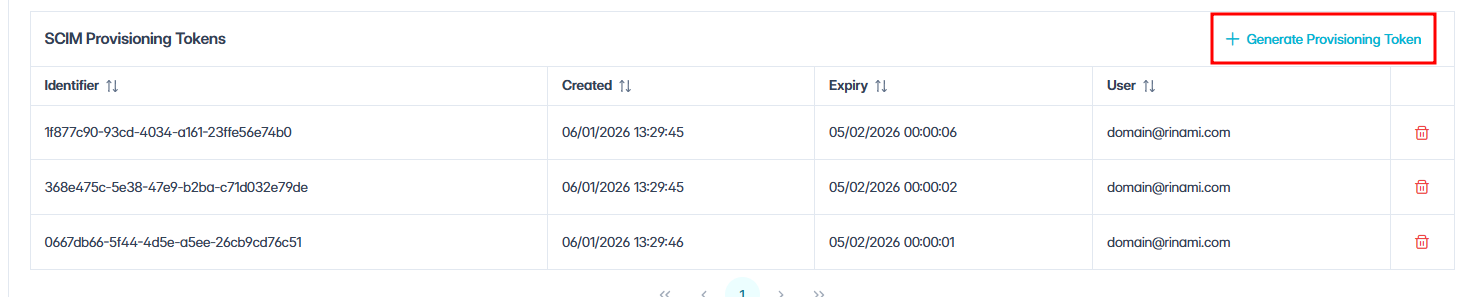
Scroll to the Provisioning Tokens section at the bottom of the Tenant Management screen.
-
Click + Generate Provisioning Token.
-
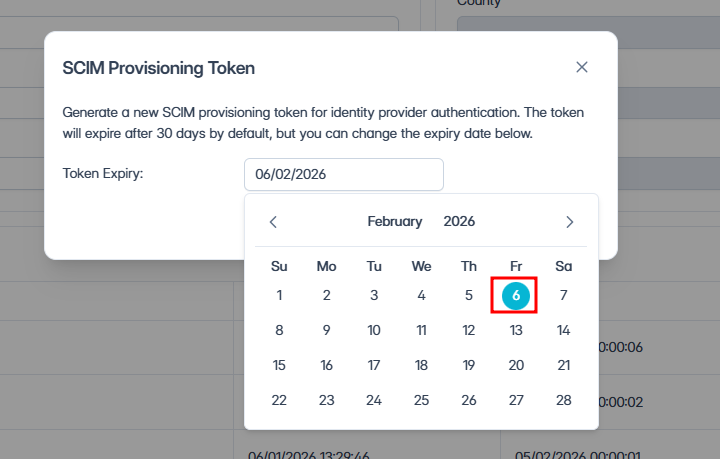
In the dialog box, select an expiry date.
Note: By default, tokens expire after 30 days. This can be adjusted using the date selector. Tokens function like passwords and expire after a configurable period. Once expired or deleted, a new token must be generated.
-
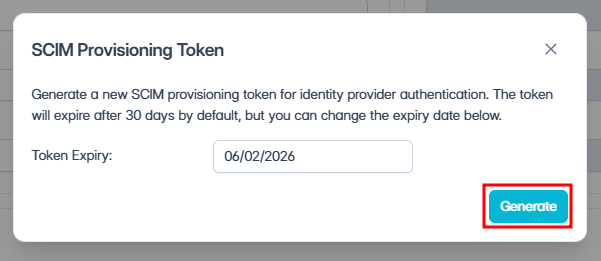
Click Generate.
-
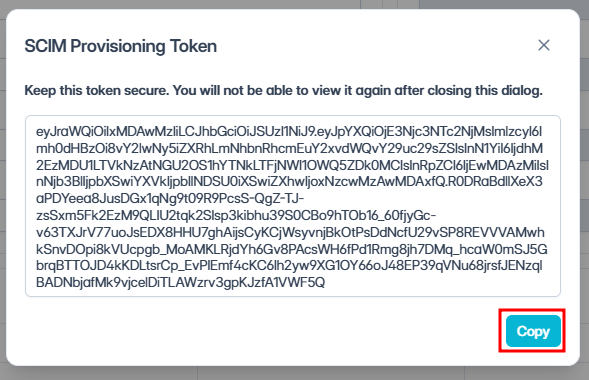
Copy the token.
Note: Securely store the newly generated token immediately, it cannot be retrieved later.
Step 2: SCIM Setup Information in Your Identity Provider
-
Configure SCIM provisioning using the following details:
Tenant URL:
https://cip7.cantara.cloud/scim/v2/<TenantID>
Authentication Method:
-
Bearer Token (use the token generated above)
Recommended User Attributes:
|
Attribute |
Required |
|---|---|
|
|
Yes |
|
|
Yes |
|
|
Yes |
|
|
Yes |
|
|
Yes |
|
|
Yes |
|
|
Yes |
|
|
Yes |
|
|
Optional |
Note: Some IdPs provide extra attributes by default. Remove any unnecessary fields to keep provisioning focused and efficient.
-
Enable provisioning in your IdP.
What to Expect
Once SCIM provisioning is enabled, accounts provisioned from the IdP will appear in Cantara with the following behaviour:
-
Account Source — Displays as SCIM (rather than Local).
-
Account fields — Read-only in Cantara. Changes must be made in the IdP.
-
User updates — Changes made in the IdP (e.g., name, email, phone) are automatically synced to Cantara.
-
Deactivation — When a user is deactivated or removed in the IdP, the account is automatically deactivated in Cantara.
-
Groups — Group memberships configured in the IdP are synced and reflected in Cantara Security Groups.
What’s next
With user access and provisioning set up, the next step is to understand how to assign Security Topics, see User Permissions.