Purpose
Guide administrators through manually adding a user account in the Cantara Administration Console.
Before you begin
-
You have access to the Cantara Administration Console and permission to manage user accounts.
-
An existing tenant is configured in the system.
Procedure
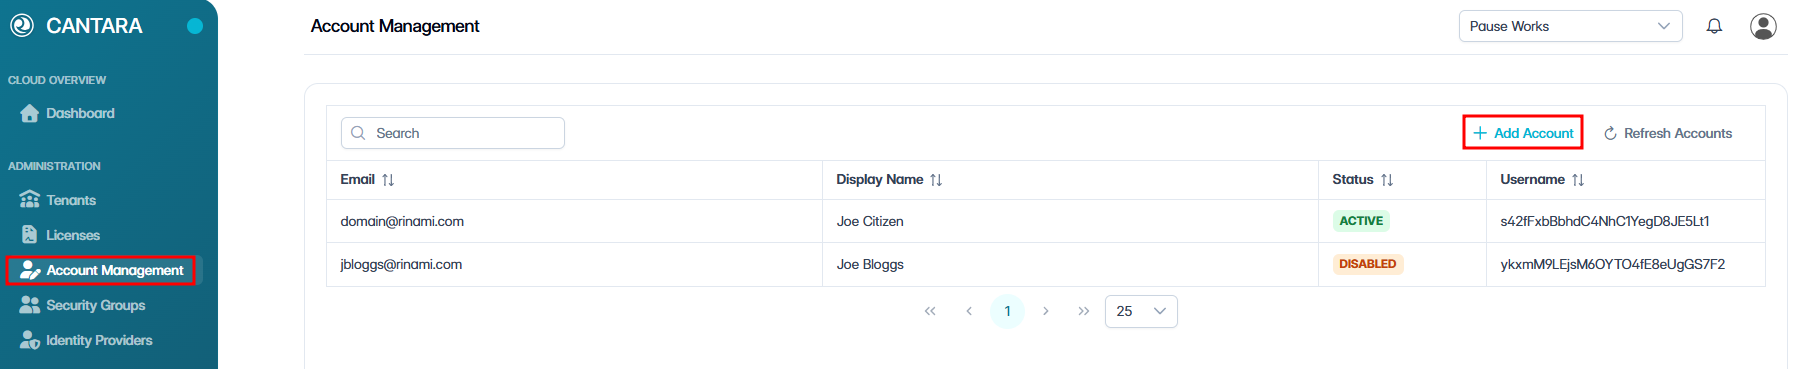
To add an account:
-
Navigate to Account Management.
-
Click + Add Account in the top right of the account list.
-
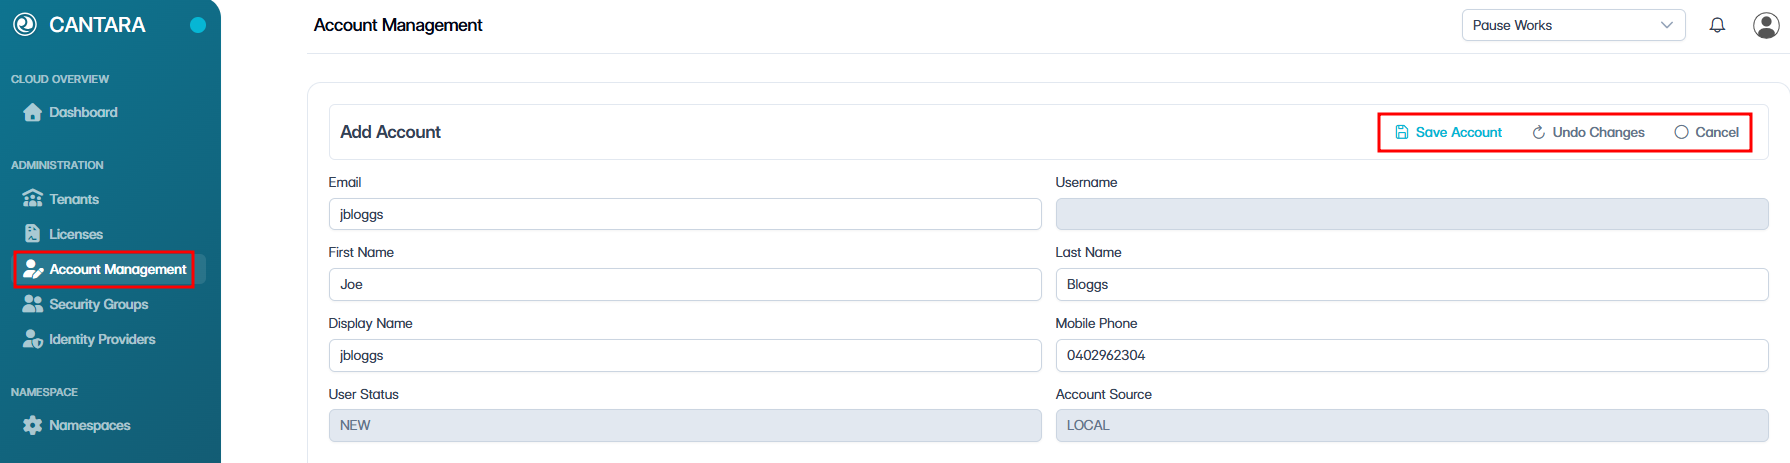
Enter the following details:
|
Field |
Description |
|---|---|
|
|
User’s primary work email. Note: This must be a valid email address used for login and notifications. |
|
Username |
Unique identifier for the user. (Read only) |
|
First Name |
User’s first name. |
|
Last Name |
User’s last name. |
|
Display Name |
Full name as displayed in Cantara. |
|
Mobile Phone |
User’s mobile phone number. |
|
User Status |
Initial status is New. (Read only) |
|
Account Source |
Defaults to LOCAL. (Read only) |
-
Click Save Account.
Outcome
The account is created and listed on the Account Management screen.
Email Verification
After the account is created, the account status is set to New and the user receives an email verification link at the email address entered for the account.
Once the user has completed email verification and password setup, an administrator must manually enable the account before the user can access the platform. See Enable or Disable an Account.
What’s next?
-
If you are using Local Accounts, the user account is now ready to use. You can assign access permissions, see User Permissions.
-
If you are using Single Sign-On (SSO), see Identity Provider Integration to enable authentication.