
Overview
Use this guide to run the Cantara Agent installation script on the target server and complete the installer prompts. The script deploys the required runtime components and configures the Agent connection to Cantara Cloud.
Before you begin
Confirm the following details are available before you start:
-
Permissions: On Linux, you have root access or can run the installer with
sudo. On Windows, you can run PowerShell as an administrator. -
Licenses: Confirm the Cantara Cloud license is active for the namespace.
-
Namespace: The target namespace has been created in CIP7.
-
Agent URL: The Agent URL has been entered in CIP7. The Agent API key is generated only after the Agent URL is defined.
-
Install directory: If you are not using the default directory, the target folder should not already exist.
Procedure
-
Copy the Agent installation command or link provided.
-
Run the script on the target server:
-
On Linux, run the script with
sudoor as root. -
On Windows, run PowerShell as an administrator.
-
-
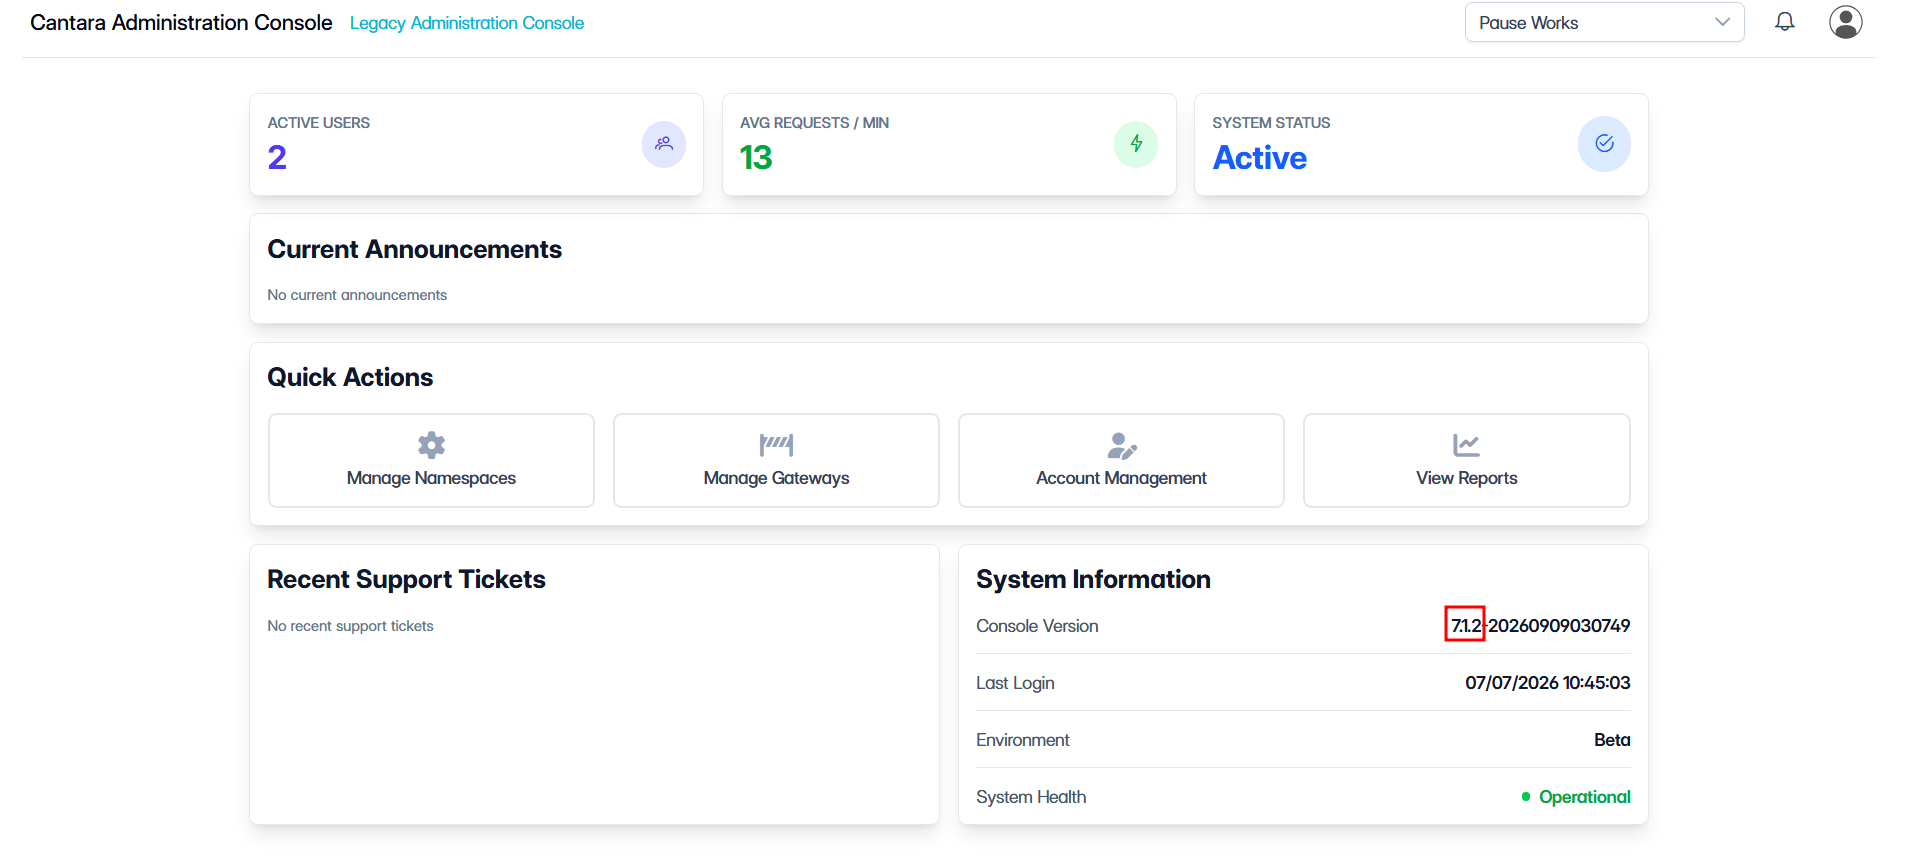
Run the script with the version flag, replacing
[latest version]with the version shown on the installation page:
[sudo] ./cip7-agent-install.sh --{latest version}
Note: In CIP7, you can find the version number on the dashboard. Use the Console Version value before the dash as the version number.
-
Follow the installer prompts. Leave a prompt empty to use the default value, unless your environment requires a specific setting. When prompted, enter or confirm the following values in order:
-
Service user and group
Accept the default value, unless your environment requires a specific service account or group. On Linux, the installer can create the service user and group if required. -
Install destination folder
Accept the default folder, or enter a custom target folder. If using a custom folder, the target folder should not already exist. -
JDK installation method
Select the default option, unless your environment requires a specific JDK installation method. The installer can useJAVA_HOME, install a supported JDK, or use a specified JDK path.

-
Tenant ID
Enter the Tenant ID from CIP7. This identifies the CIP7 tenant the Agent connects to.
-
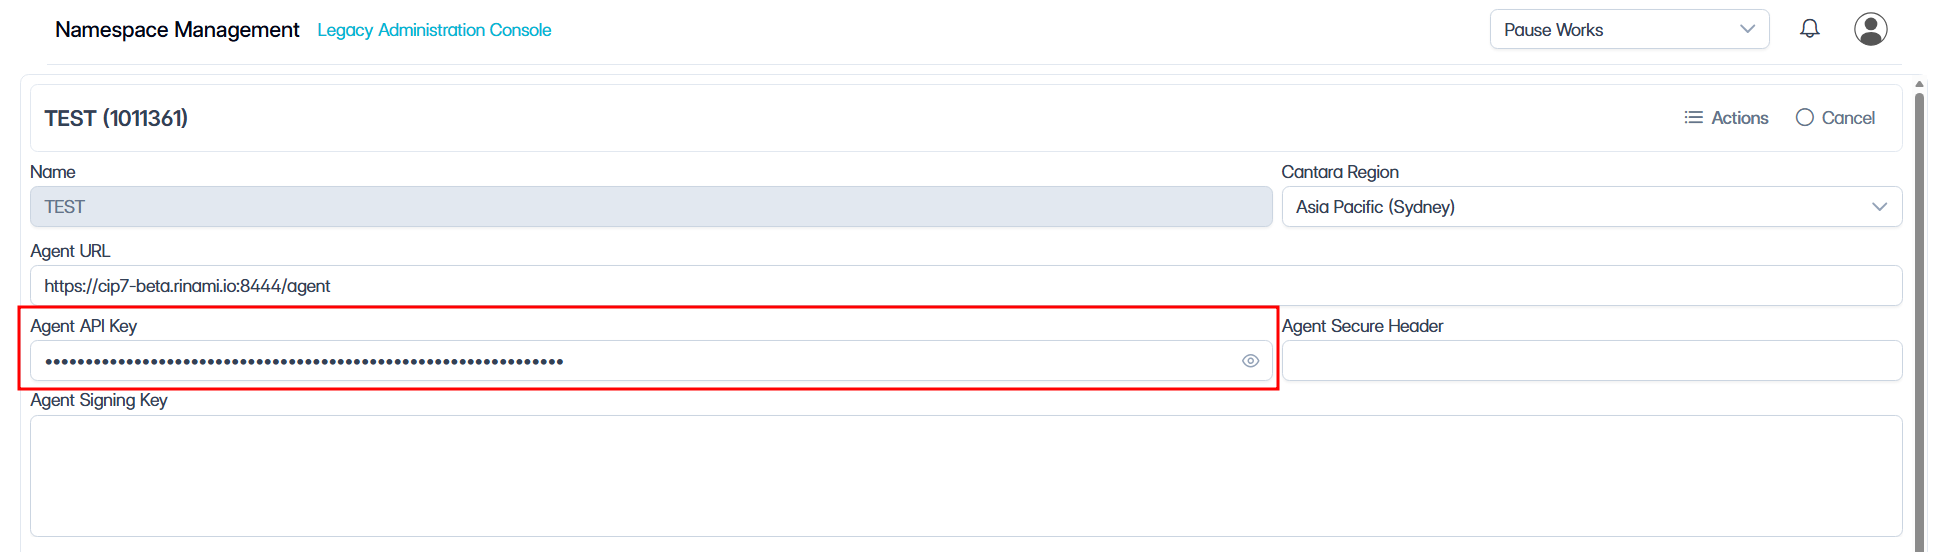
Agent API key
Enter the Agent API key from your CIP7 namespace. The Agent API key is generated only after the Agent URL has been entered in CIP7. -
Agent URL
Enter the Agent URL from your CIP7 namespace. The installer may label this prompt as External URL. -
Region
Enter or confirm the region required for the environment, such as AP, US, or EU. Leave empty only if the default matches your environment.
-
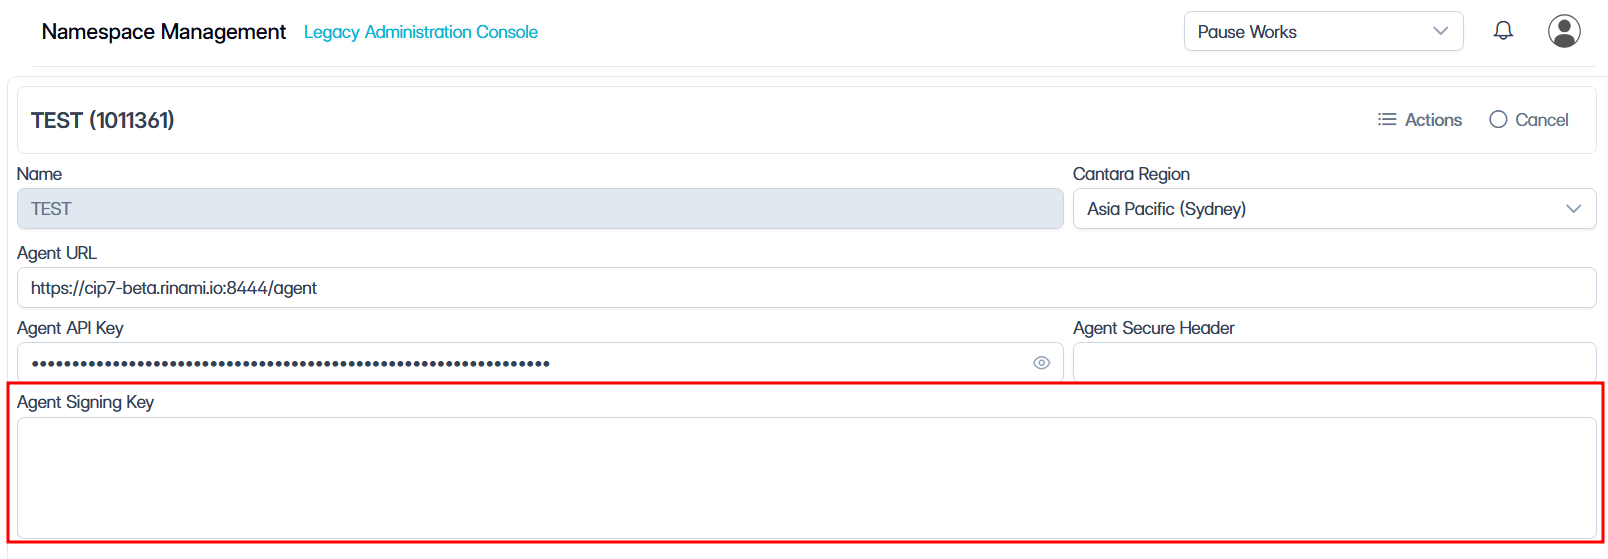
Agent Signing Key
Enter the Agent Signing Key from your CIP7 namespace. The Agent Signing Key is only displayed once when the namespace is created. If you did not save it, generate a new Agent Signing Key before continuing.
Note: Resetting the Agent Signing Key
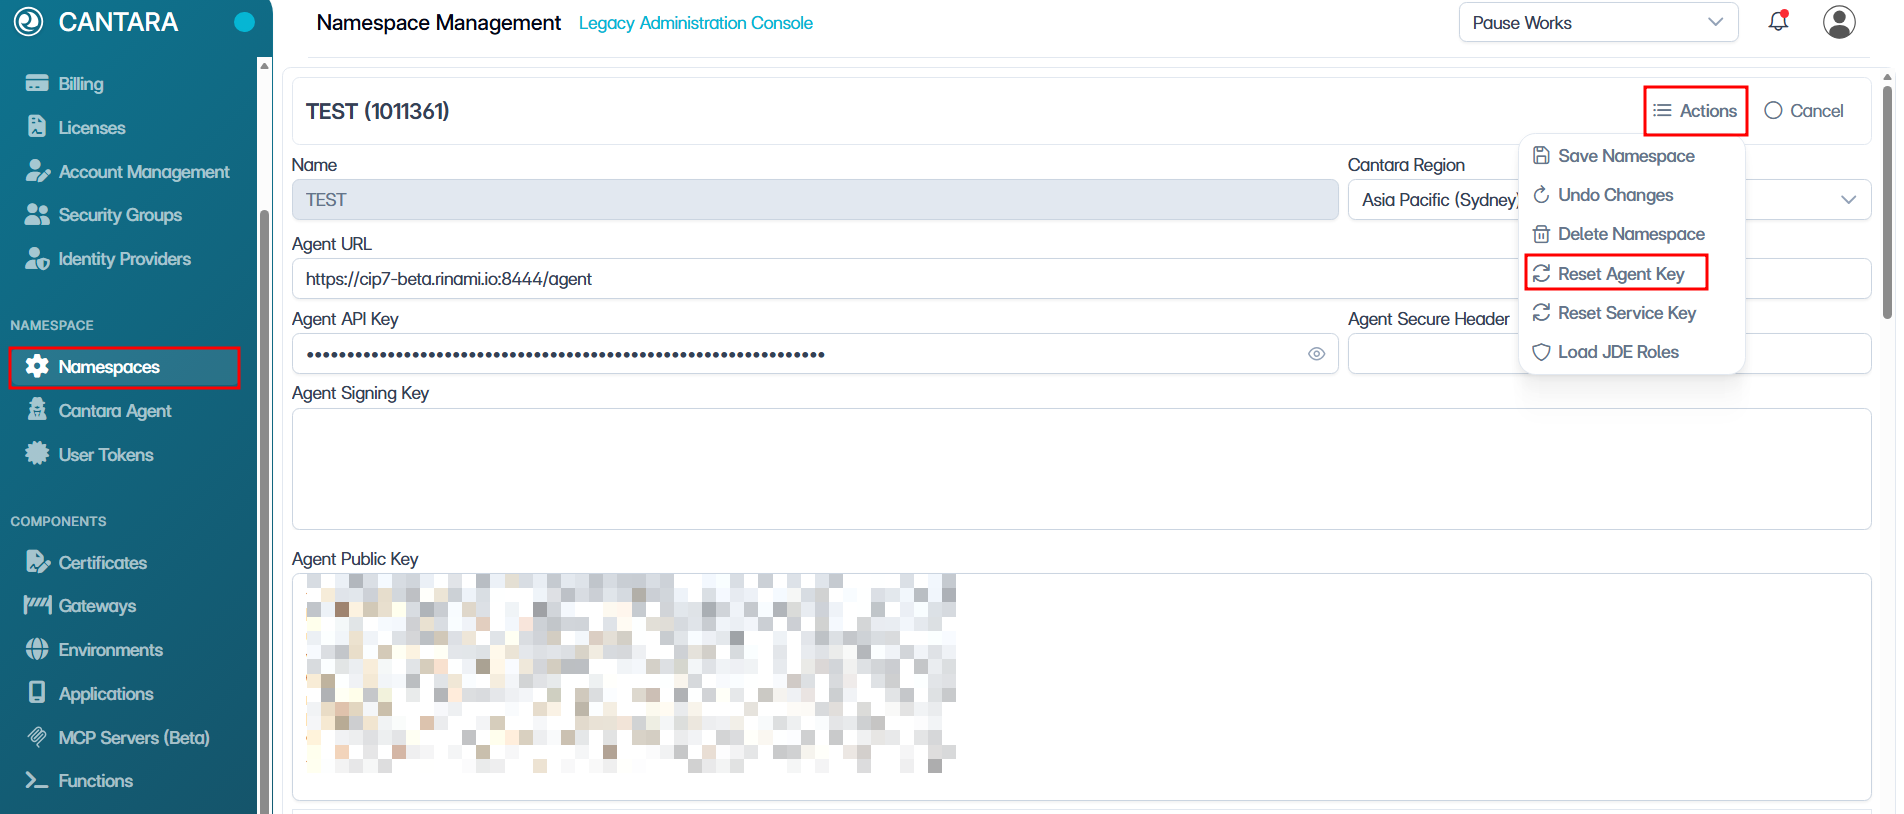
If you do not have the original key, you can generate a new one from the Cantara Administration Console:
-
In Cantara, navigate to Namespaces.
-
Select the appropriate namespace.
-
Click Actions and select Reset Agent Key from the dropdown menu.
-
Copy the newly generated key and paste it into the installer prompt.
-
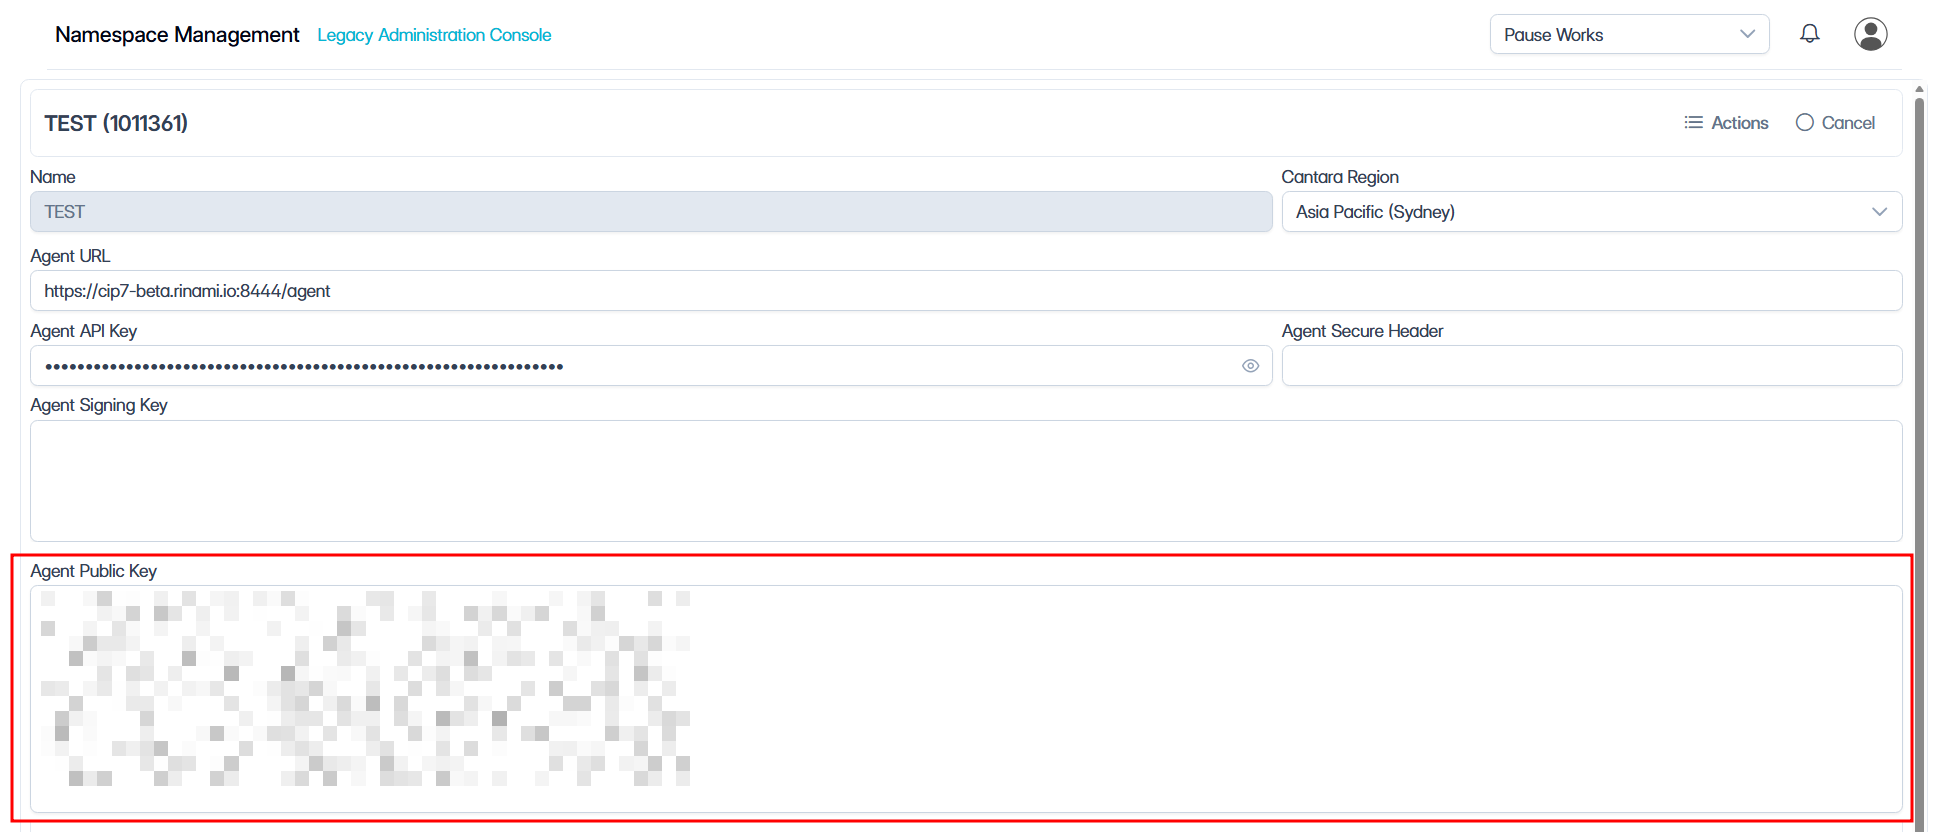
Agent Public Key
Paste the Agent Public Key from your CIP7 namespace. PressCtrl+Dafter pasting the key to finish the entry. -
System service
Choose whether to create and start a system service. For Linux installations, this creates a SystemD service so the Agent can start automatically with the server. This is recommended when the Agent should run continuously as a service.
What’s next?
Confirm the Agent appears in Cantara Cloud and shows the expected status, host, version, JVM details, and logs. For validation steps, refer to the confirmation page in this Agent Installation series.