The following will guide you through the process of upgrading a single instance Cantara installation from version 5.0 to version 5.1.
This process will require some important files to be downloaded, database scripts be run and configuration JSON files edited to reflect the appropriate paths and database names
used in your current installation.
As this process will involve changes to your Cantara databases and other files, please back these and all other important files up.
1:) Download Required Files
The following files will be required during the upgrade process;
|
Component |
Vendor |
Link |
Sample File Name |
|---|---|---|---|
|
Cantara Access Server 5.1.x |
Rinami |
https://portal.cantara.cloud/software |
cantara-server-5.1.1.20181204-SERVICE_TYPE.zip |
|
Cantara Assur Server 5.1.x |
Rinami |
https://portal.cantara.cloud/software |
cantara-assur-5.1.1.20181204-SERVICE_TYPE.zip |
|
Cantara Administration Console 5.1.x |
Rinami |
https://portal.cantara.cloud/software |
cantara-console-5.1.1.20181204-SERVICE_TYPE.zip |
|
Cantara 5.1 Upgrade Tool |
Rinami |
cantara-upgrade-5.1.9.zip |
cantara-upgrade-5.1.1.zip |
|
MySQL Single Database Upgrade Script |
Rinami |
Unknown Attachment |
mysql50-51.sql |
|
MySQL Console Database Upgrade Script |
Rinami |
Unknown Attachment |
mysql50-51-console.sql |
|
MySQL Assur Database Upgrade Script |
Rinami |
Unknown Attachment |
mysql50-51-assur.sql |
|
Oracle Single Database Upgrade Script |
Rinami |
Unknown Attachment |
oracle50-51.sql |
|
Oracle Console Database Upgrade Script |
Rinami |
Unknown Attachment |
oracle50-51-console.sql |
|
Oracle Assur Database Upgrade Script |
Rinami |
Unknown Attachment |
oracle50-51-assur.sql |
|
Microsoft Single Database Upgrade Script |
Rinami |
Unknown Attachment |
sqlsvr50-51.sql |
|
Microsoft Console Database Upgrade Script |
Rinami |
Unknown Attachment |
sqlsvr50-51-console.sql |
|
Microsoft Assur Database Upgrade Script |
Rinami |
Unknown Attachment |
sqlsvr50-51-assur.sql |
To download the Cantara files, navigate to the Rinami portal > Software > Enterprise and select the appropriate server version, then select the latest version for download.
2:) Shutdown Cantara Services
To ensure a smooth and successful upgrade, all Cantara services must be stopped before beginning the upgrade process.
Follow the standard procedure for your operating system and environment to stop all Cantara Services.
ALL CANTARA SERVICES MUST BE STOPPED BEFORE CONTINUING
3:) Prepare Databases
One of the primary differences between Cantara 5.0 and 5.1 is the migration from XML to JSON notation. As such your Cantara databases need to be modified.
We have provided script files to prepare them for this.
BEFORE CONTINUING: As is standard procedure when making changes, please ensure you back up your databases to prevent data loss.
Download the script file to a convenient location and run the appropriate script for your database.
The script will need to be run for EACH console database and assur database, but NOT the worker databases.
Once the databases have been upgraded, you can proceed to upgrading the application files.
4:) Extract Cantara 5.1 Application Files
Once you've downloaded the application files, prepare your installation by backing up and renaming the exploded Cantara 5.0 WAR folders.
Navigate to your farm installations and rename the WAR folders as shown:
|
Original |
New Name |
|---|---|
|
console.war |
console.war.50 |
|
assur.war |
assur.war.50 |
|
worker.war |
worker.war.50 |
Each renamed war folder should now be replaced by extracting the Cantara 5.1 files as follows:
|
Zip File |
WAR |
|---|---|
|
cantara-console-5.1.1.20181204-SERVICE_TYPE.zip
|
console.war |
|
cantara-assur-5.1.1.20181204-SERVICE_TYPE.zip
|
assur.war |
|
cantara-console-5.1.1.20181204-SERVICE_TYPE.zip
|
worker.war |
Once these files have been extracted, copy the Oracle JD Edwards EnterpriseOne Interoperability Libraries to the /WEB-INF/lib directories
of was assur.war and worker.war folder. Refer to the following link for this process:
Installing the JD Edwards Interoperability Libraries
5:) Configure Upgrade.JSON File
Extract the contents of the upgrade tool to an appropriate directory and locate the upgrade.json file. This file will need to be modified with details
of the farms and respective databases that will be upgraded. The following example provides a template for configuring the upgrade tool, replace
paths, types and URLs as appropriate:
{
    "fromVersion": "5.0",
    "consoles": [{
        "installationPath": "PATH_TO_YOUR_CONSOLE_INSTALLATION",
        "etcPath": "PATH_TO_YOUR_CONSOLE_INSTALLATION/etc"
    }],
    "consoleDatabase": {
        "connectionUrl": "CONSOLE_DATABASE_HOST_URL?useSSL=false",
        "username": "YOUR_USERNAME",
        "password": "YOUR_PASSWORD",
        "type": "YOUR_DATABASE_TYPE"
    },

    "workers": [{
        "installationPath": "PATH_TO_YOUR_WORKER_INSTALLATION",
        "etcPath": "PATH_TO_YOUR_WORKER_INSTALLATION/etc"
    }],
    "workerDatabase": {
        "connectionUrl": "WORKER_DATABASE_HOST_URL?useSSL=false",
        "username": "YOUR_USERNAME",
        "password": "YOUR_PASSWORD",
        "type": "YOUR_DATABASE_TYPE"
    },
    "assur": [{
        "installationPath": "PATH_TO_YOUR_ASSUR_INSTALLATION",
        "etcPath": "PATH_TO_YOUR_ASSUR_INSTALLATION/etc"
   }],
    "assurDatabase": {
        "connectionUrl": "ASSUR_DATABASE_HOST_URL?useSSL=false",
        "username": "YOUR_USERNAME",
        "password": "YOUR_PASSWORD",
        "type": "YOUR_DATABASE_TYPE"
    }
}
The upgrade.json file will need to be modified to point to each farm being upgraded. To simplify this process, you can create an upgrade_FARMNAME.json file for each
farm being upgraded.
Once these json files are configured you can run the upgrade tool.
6:) Run Upgrade Tool
Once you've configured the upgrade.json files, start a terminal and navigate to the cantara-upgrade/bin/ folder then run the appropriate command.
./cantara-upgrade $PATH_TO_UPGRADE.JSON/$upgrade_FARMNAME.json
./cantara-upgrade.bat %PATH_TO_UPGRADE.JSON/%upgrade_FARMNAME.json
Run the command for each farm being upgraded.
Once you've upgraded each farm, you can restart the services and verify the upgrade.
7:) Restart Services and Verify
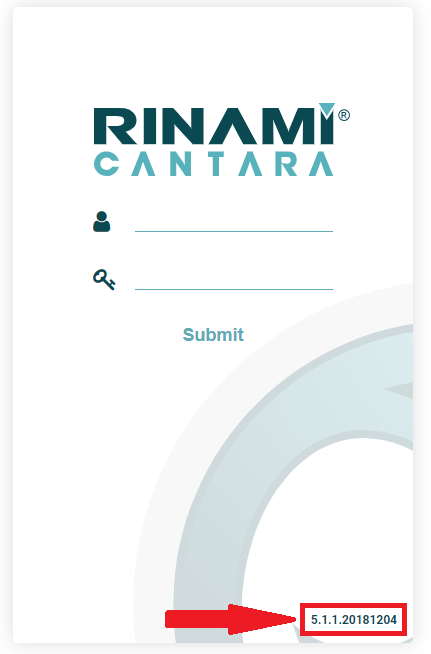
Once the upgrades have completed, restart the Cantara services and navigate to the console page in your browser.
If the upgrade has succeeded, the new version number 5.1.x will be reflected as shown: