Make sure you have done the following before deploying Cantara Administration Console:
-
Have an existing Glassfish Server Instance or have created a server instance that meets the Cantara Administration Console Technical Requirements.
-
Set up the file system folders and confirmed that the user the Glassfish Server is running as has read and write permission to these folders.
-
Extracted the Cantara Administration Console application .ZIP archive file into the installation folder according to the Installing the Cantara Administration Console Web Application instructions.
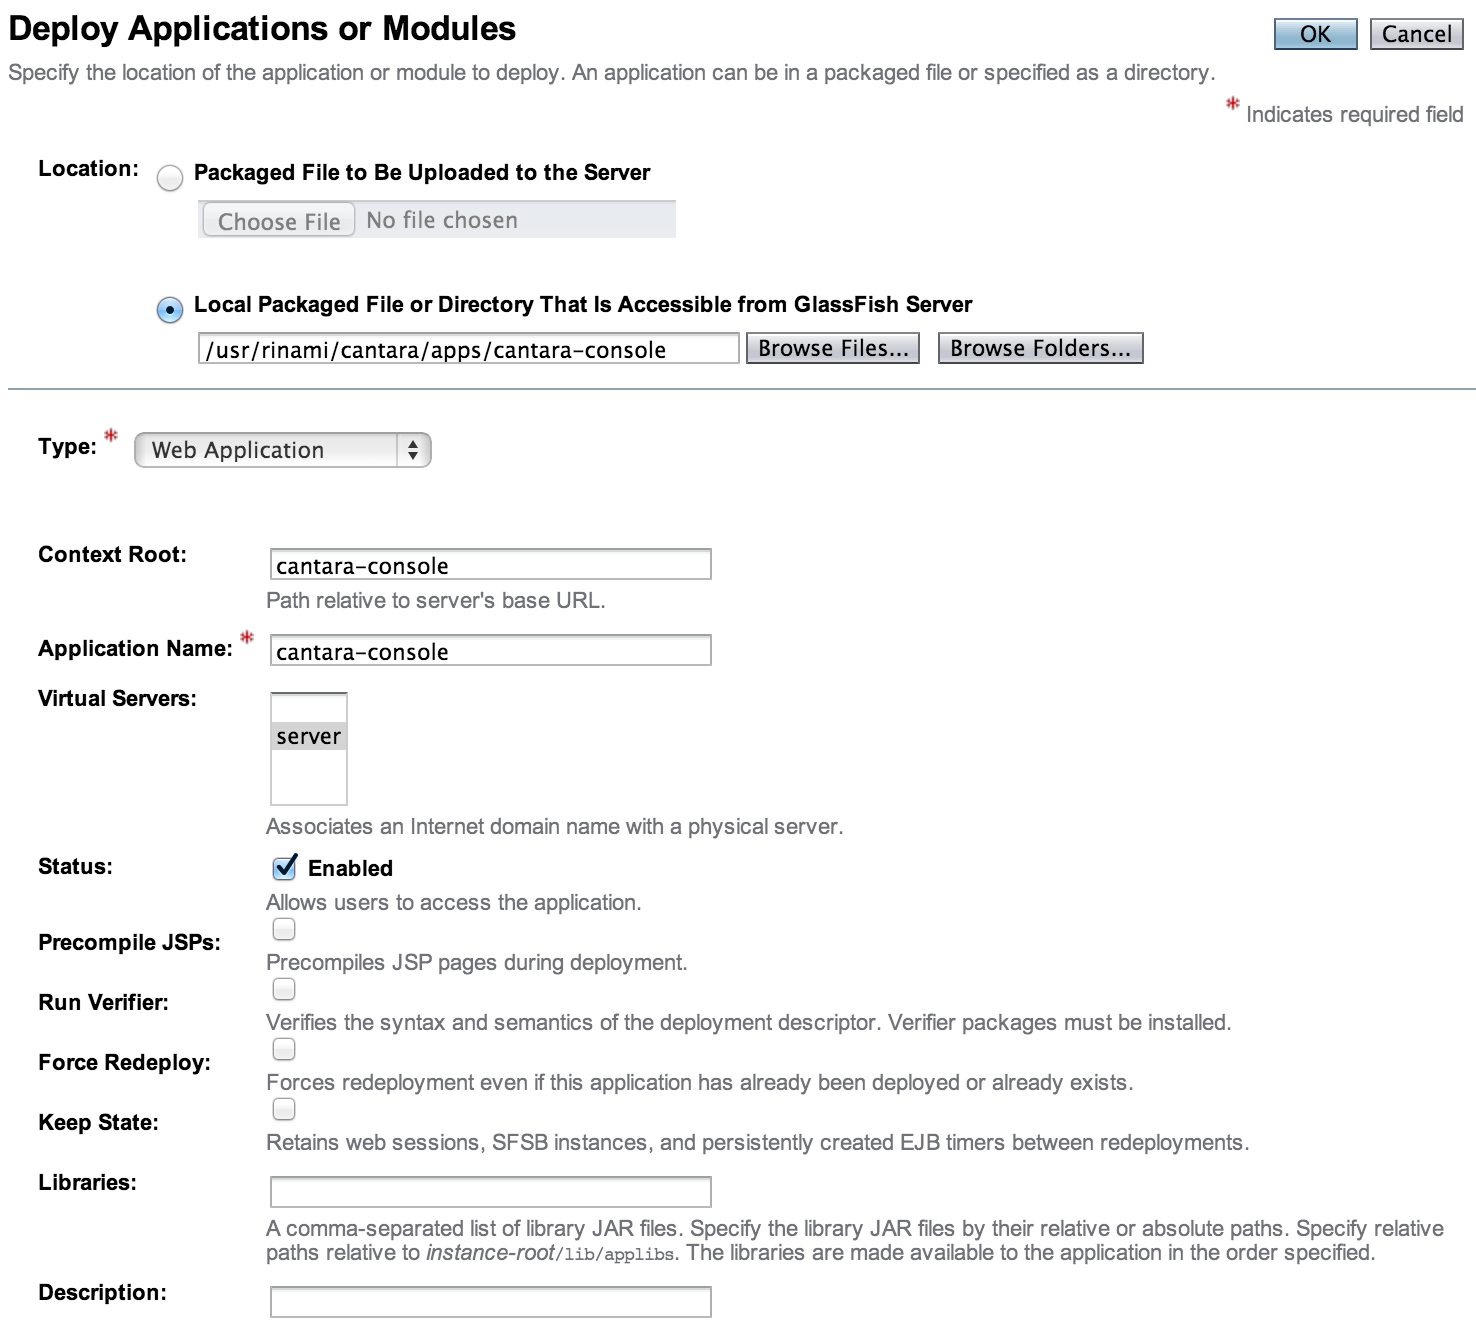
To deploy an instance of the Cantara Server
-
Log in to the Glassfish Server Administration Console.
-
Go to the Applications page and select Deploy.
-
Select the Locate Packaged File or Directory That Is Accessible from Glassfish Server option.
-
Click Browse Folders... and browse to the Cantara Administration Console installation folder.
-
Choose the Web Application application Type and confirm that the Context Root is acceptable.
-
Click OK to deploy the application.
-
If the deployment is successful, you will see the Cantara Administration Console in the list of deployments with the Enabled column selected. If the deployment fails to start, check the appropriate Glassfish logs for deployment errors.
-
Launch the web application to begin the configuration process.