The information on this page applies to On-Premises deployments only.
The Cantara Access Server manages the transactions with JDE servers to support the execution of functions, reports, and other configured components. The Access Server is also responsible for running a scheduler so that services can be automated.
Managing Access Servers
Adding an Access Server
-
Open the Farm menu group in the navigation panel.
-
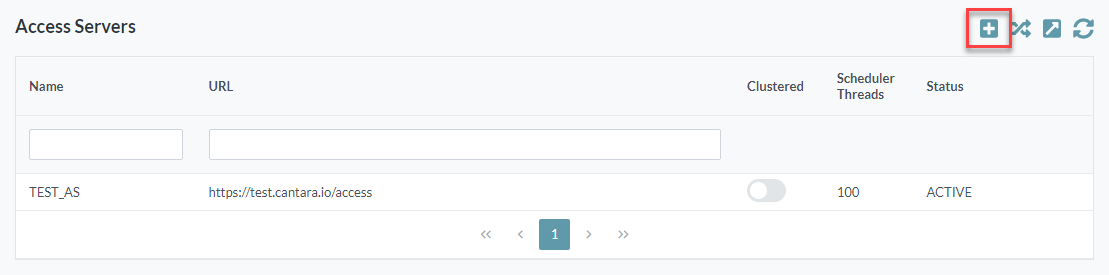
Select the Access Servers node. The Access Servers configuration screen is displayed.
-
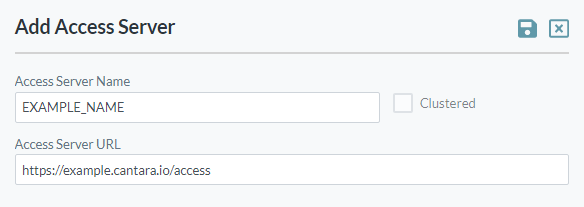
To add a new Access Server, click the Add button. The Add Access Server screen is displayed.
-
Configure settings as follows:
-
Access Server Name: The unique name you want to assign to the server. The value for this field can be a maximum of 12 characters (no spaces). Valid characters include numbers, letters, underscore (_) and a dash (-).
-
Clustered: This is an information field indicating whether the Access Server URL represents multiple access servers deployed within a containerized environment. This field can only be modified by editing the cantara.clustered.instance property - refer to Creating the Access Server Properties File for further information.
-
Access Server URL: The unique URL for the Cantara Access Server, including the root context
-
-
Click the Save button. If the Access Server is online, the Scheduler Controls for the Access Server will be displayed. Refer to Access Servers | Scheduler Controls below for further information.
Access Server Settings
-
Software Version: Information field only. Cannot be edited.
-
Log Level: Refer to the Log Level Reference.
-
Scheduler Thread Count: The maximum number of jobs the system can submit and monitor simultaneously on the server. Note that this setting cannot be changed whilst the Tenant Scheduler is RUNNING.
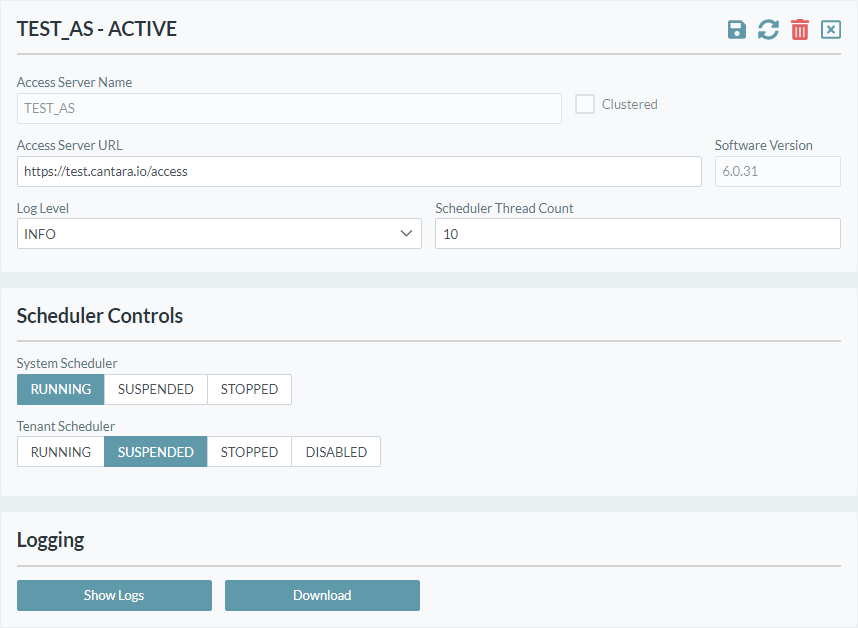
The Scheduler Thread Count must always be greater than the maximum number of batch jobs that are expected to run simultaneously in the tenant scheduler.
Log Level Reference
|
Log Level |
Description |
|---|---|
|
ALL |
Logs all operations of the access server. This generates a large amount of log data and should only be used when troubleshooting issues. |
|
TRACE |
Logs almost all operations of the access server. This generates a large amount of log data and should only be used when troubleshooting issues. |
|
DEBUG |
Logs debugging information for the access server. Should only be used on non-production servers. |
|
INFO |
Logs information that assists with configuration and performance tuning. Can be used on production servers. |
|
WARN |
Logs all errors and warnings. Recommended for new production installations. |
|
ERROR |
Logs all errors generated by the access server. Recommended minimum level for production servers. |
|
FATAL |
Logs only errors that would have caused the access server to stop processing requests. Only recommended for production servers in a mature environment. |
|
OFF |
No logging. Not recommended. |
Access Server Status
|
Status |
Description |
|---|---|
|
ACTIVE |
The server is running and ready for requests |
|
UNCONFIGURED |
The server is available but is not configured to process requests |
|
LICENCE_EXPIRED |
The configured licence has expired |
|
LICENCE_EXCEEDED |
The active user count has exceeded the licensed user limit |
|
ERROR |
The server is currently unable to process requests, please check system logs to identify the issue |
|
UNRESPONSIVE |
The server cannot be contacted |
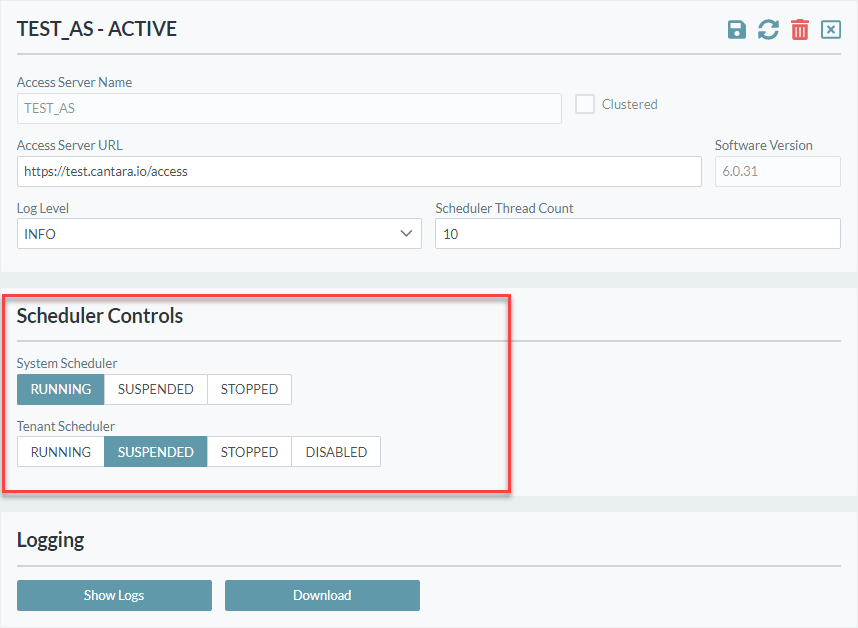
Scheduler Controls
Each Access Server contains a system scheduler and a tenant scheduler:
-
System Scheduler: An internal scheduler used to update the Dashboard and other internal functions.
-
Tenant Scheduler: Responsible for submitting scheduled groups of requests to JDE.
Each Access Server configuration screen contains a series of Scheduler Control buttons, enabling the user to view and change the operational state of the scheduler. For information about managing the operational state of a scheduler, refer to Starting and Stopping the Scheduler.
Logging Controls
Log data for Access Servers can be viewed, filtered and downloaded using the buttons at the bottom of the Access Server screen.

Modifying an existing Access Server
-
Open the Farm menu group in the navigation panel.
-
Select the Access Servers node.
-
Select the Access Server to be edited, and make the required configuration changes..
-
The reset button on the left hand pane refreshes the current data from the server.
-
The reset button on the right hand pane only clears changes made to the form (no server refetch).
-
-
Click the Save button to save your configuration changes.
Delete an Access Server
-
Open the Farm menu group in the navigation panel.
-
Select the Access Servers node.
-
Select the Access Server to be deleted.
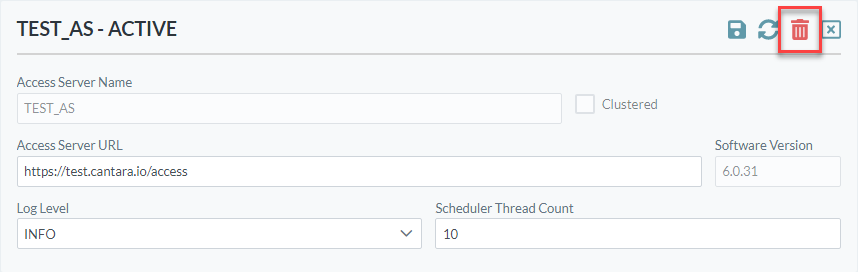
-
Click the Delete button in the top right corner.
-
Confirm the delete operation.
Additional Configuration and Performance Tuning for Access Servers
Tuning and configuration of Access Servers is further supported by directly editing the Access Server Properties File.