Adding and Exporting a Query
Query definitions you create are linked to tables or business views on the JDE server. Once you create a query, you can load it to view and modify (where applicable) its data structure.
Note
Cantara adheres to the JDE security model when using the XML List Kernel or data access driver to access data. The content that is displayed for tables, views, and queries is based on your security level in JDE.
Creating a Query
To create a query service
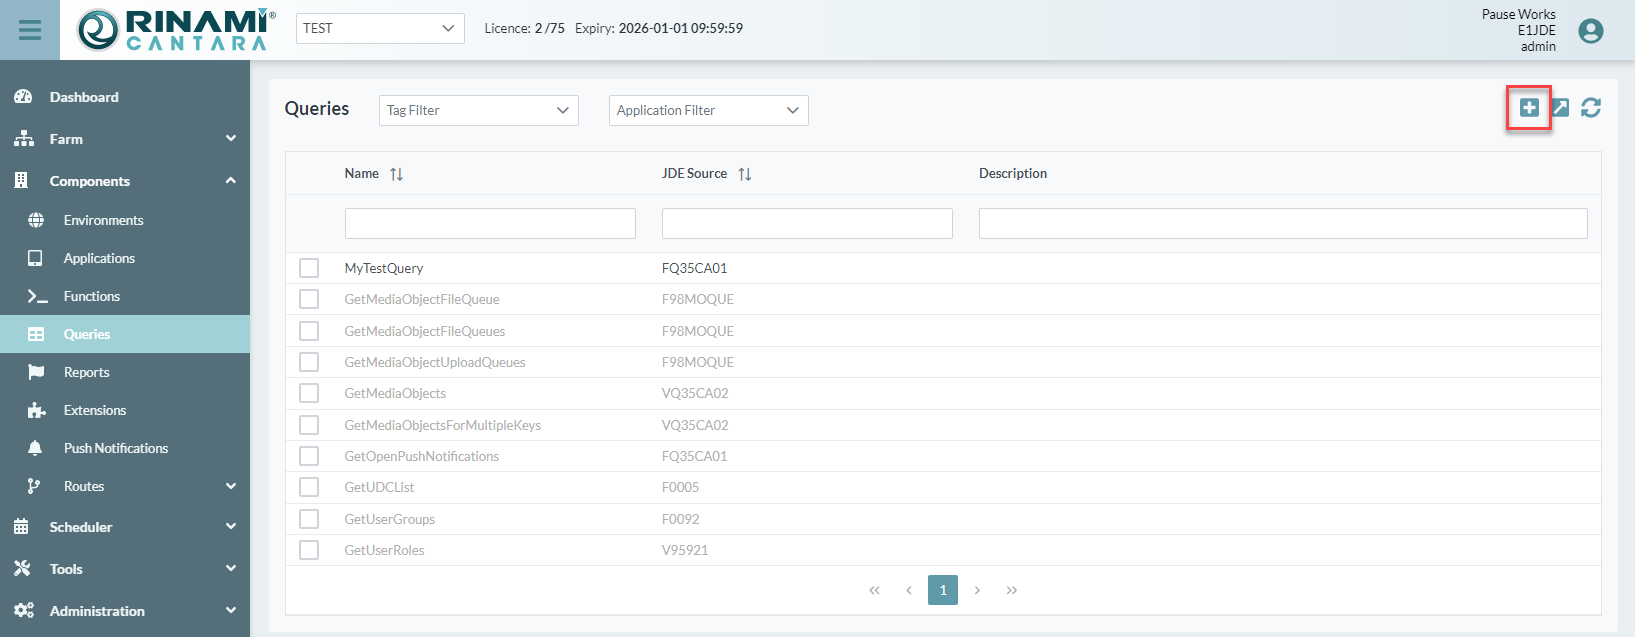
- Open the Components menu group in the navigation panel.
- Select the Queries node. The Queries screen is displayed.
- Click the Add button in the top right corner of the screen. The Add Query screen is displayed.
- Enter a new Query Name that will be used to make the system calls. The value for this field can be a maximum of 40 characters (no spaces). Valid characters include numbers, letters, underscore (_) and dash (-).
- Optionally enter a Description for the query.
- Enter a JDE Table / View and select the query Type from the selection list. If the type is incorrect, the query will fail to load.
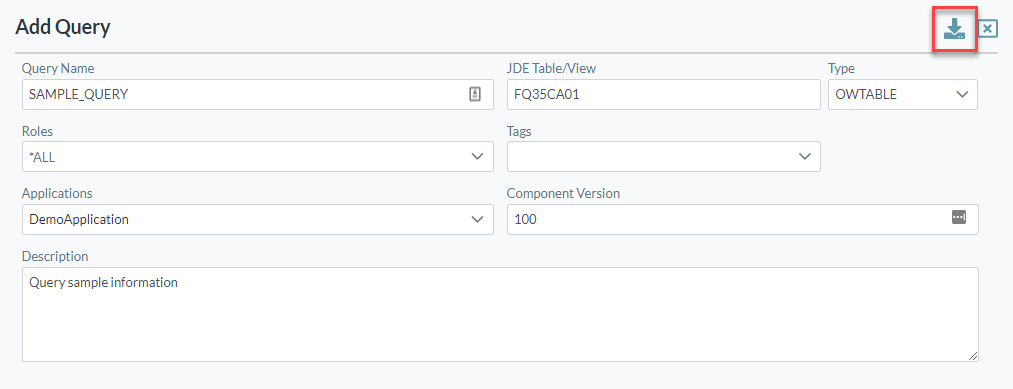
- Click the Load Template button in the top right corner of the screen to display the query parameters.
If prompted, log in with your JDE credentials. The Query Parameters will be displayed.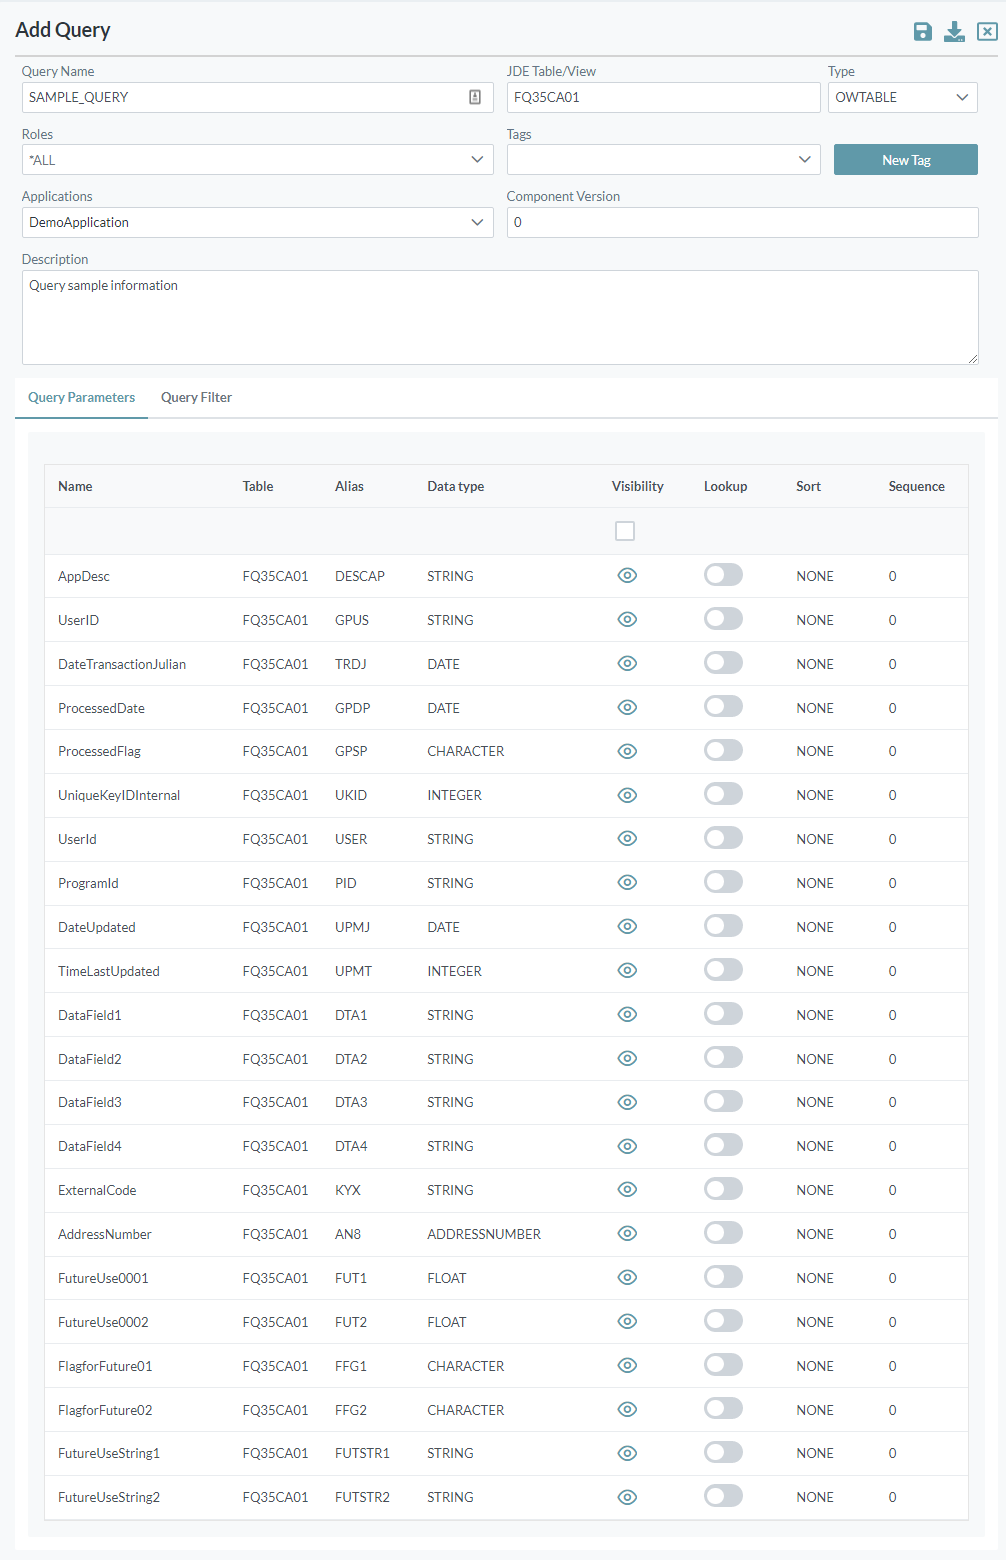
- Each query parameter can be modified to suit your specific requirements. Refer to Query Parameters for details.
- You can add Query Filter fields to limit the number of records selected. Refer to Adding a Filter for details.
- Add Tags to your function to assist with management of component definitions. You can select from the existing tags or add a new tag.
- Select the Applications that will use this query (to support application-based filtering).
- Enter the Component Version for the Query.
- You can also select the Roles that are permitted to execute this query.
- Click the Save button in the top right corner.
Query Parameters
The following table lists the parameters for a selected table or JDE view.
| Field | Description |
|---|---|
| Name | The name you want to assign to the column. By default, the system populates this field with the JDE Name. You can change the value to one that is more meaningful to you. The value for this field can be a maximum of 40 characters (no spaces). Valid characters include numbers, letters, underscore (_) and dash (-). |
| Table | The name of the table that the column is in. |
| Alias | The JDE alias for the field. |
| Data Type | Data type for the parameter. The Cantara Access Server can determine the basic data types such as STRING, CHARACTER, and DATE, but is not able to automatically determine if the field is a complex data type such as ADDRESSNUMBER or BUSINESSUNIT unless it has been defined in the defaults definition file on the server. You can manually set these values to make sure the data sent to or returned from JDE is handled correctly and to enable the advanced lookup functionality. Refer to the Definition Data Types table for details about each of the data types. |
| Hidden | Checkbox to specify whether you want the table column to be returned in the results or hidden. |
| Lookup | If selected, the system will execute the advanced lookup functionality for the data type specified. Refer to the Definition Data Types table for specific details about the lookup functionality of each of the data types. |
| Sort | Specifies sort order: NONE, ASCENDING, DESCENDING. |
| Sequence | Specifies the ranking of the sort. |
Adding a Filter
The Filter section of the query screen allows you to specify the rows you want the query to return.
To add a filter
- Open the Components menu group in the navigation panel.
- Select the Queries node, and select a query to be filtered.
- On the query details screen, select the Query Filter tab and click the Add button to add a filter.
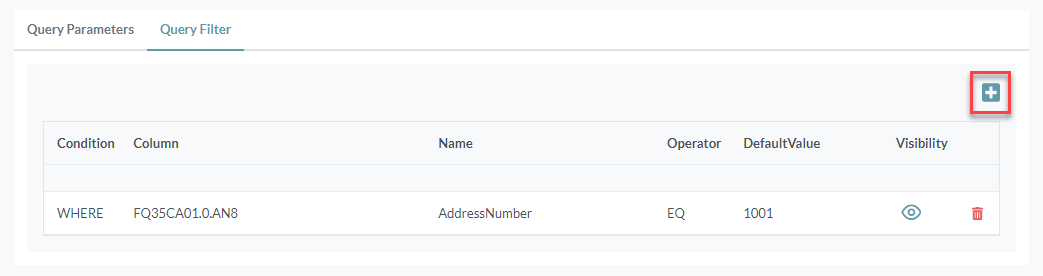
- Define the filter:
- Condition - The criteria to apply on the filter: WHERE, AND, OR.
- Column - The field to filter on.
- Name - The name of the column as specified.
Operator - Equal (EQ), Not Equal (NE), Greater Than (GT), Less Than (LT), Less or Equal (LE), Greater or Equal (GE), In (IN), Not In (NI), Between (BW), Not Between (NB), and Like (LK)*
*LK is only available with the DAD data access method.
Default Value - You can set default values for query criteria. For hidden fields only the default value will be submitted.
- Hidden - Select this option if you want the filter to be submitted in the service call.
- If necessary, you can configure additional conditions for the filter. For example, after the first WHERE condition, you could use an AND or OR condition to refine the results.
- If you need to delete a specific condition, click the Delete button on its right. The condition is immediately removed.
Tip
To create multiple queries for the same JDE table or view, click the Duplicate Query button: 
Enter a name for the new query and click the Save button. Repeat this process for each additional definition required.
Exporting a Query
After a query has been saved, the definition can be exported to assist with Cantara Client integration.
To export a query
- Open the Components menu group in the navigation panel.
- Select the Queries node. A list of available queries is displayed.
- Select the query to be exported.
- Select the Export button. A JSON-formatted definition file will be generated, which can be downloaded. For information about how this file is used in Canara Client, refer to Entity Generation (iOS) or Entity Generation (Android) depending on your client platform.
