Adding a Farm
On-Premises Installation
The Cantara Administration Console is able to manage a farm once you define the connection details. Refer to the Cantara Installation Guide for instructions to deploy a new installation. The servers must be deployed and running prior to adding it to the administration console.
You can manage multiple Farms from a single administration console instance. To define a Farm completely you need to configure the Farm, 1 Assur instance and 1 Worker instance.
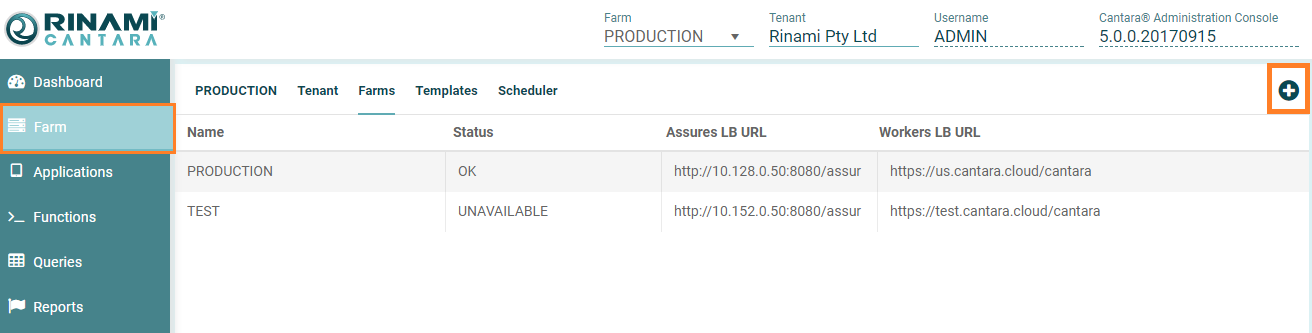
Farm Status
Your Farm will have 1 of below 3 STATUS:
OK - This status means that your farm us up and running.
WARNING - This status means that your farm is up and running but only 1 of your multiple instances (worker or assur) is up. For instance, if you should have 3 workers up and running but 1 is still active while others are not active anymore this status will appear.
UNAVAILABLE - This status means that there is no worker instance running or there is no assur instance running.In addition, this status will appear if your license is not ACTIVE or it is not configured.
To add a farm please follow these steps:
To add a Farm
- Select the Farm node in the navigation panel.
- Click the Farms button, then click Add.
- Enter a Name for the farm. The value for this field can be a maximum of 12 characters (no spaces). Valid characters include numbers, letters, and a dash (-).
- Enter the URL and database details for the Worker & Assur installation as necessary:
- Load Balancer URL: If there are multiple worker (access server) instances and there is a load balancer you need to configure the load balancer URL but if there is a single instance you can configure your worker instance URL. The same applies for assur instances.
- Database Type: The type of database you want to use. The options are None, Oracle, Microsoft, and MySQL. If you have a many instances setup, all servers will use the same database connection.
- Datasource JNDI Name: Java Naming and Directory Interface (JNDI) name to use to access the server. You can configure multiple servers (clustered configuration) to use the same datasource as long as they serve the same purpose. For example, two production servers can use the same datasource, but a production server and a non-production server that is used for testing cannot use the same datasource. This value is server-dependent. Refer to the documentation for your server for more information.
- Data Store Type: The options are NONE, DATASTORE, MONGODB. The data store is an optional tool and it is used to store REST transactions and JDE transactions. The volume of these transactions may be too high for a relational database. The options DATASTORE or MongoDB will allow other configuration fields to appear.
- Datastore Batch Rate: Cantara will store REST / JDE transactions in memory. Once the batch rate is reached all the transactions will be dumped into the datastore.
- Datastore Timeout (minutes): If the batch rate is not reached after the timeout period all transactions will be dumped into the datastore.
- Datastore Project: This is the project ID created on google cloud to be able to use a google datastore.
- Datastore Credentials Path: This is the credentials file to be able to connect to google datastore.
- Datastore MongoDB Connection: This is the MongoDB Connection URL
When a cantara assur / access server instance is installed you are able to define a token name and a token for that instance. All the instances that belongs to the same farm have to use the same token name and token. By default, it is admin/admin - Token Name: the default value is admin.
- Token: the default value is admin.
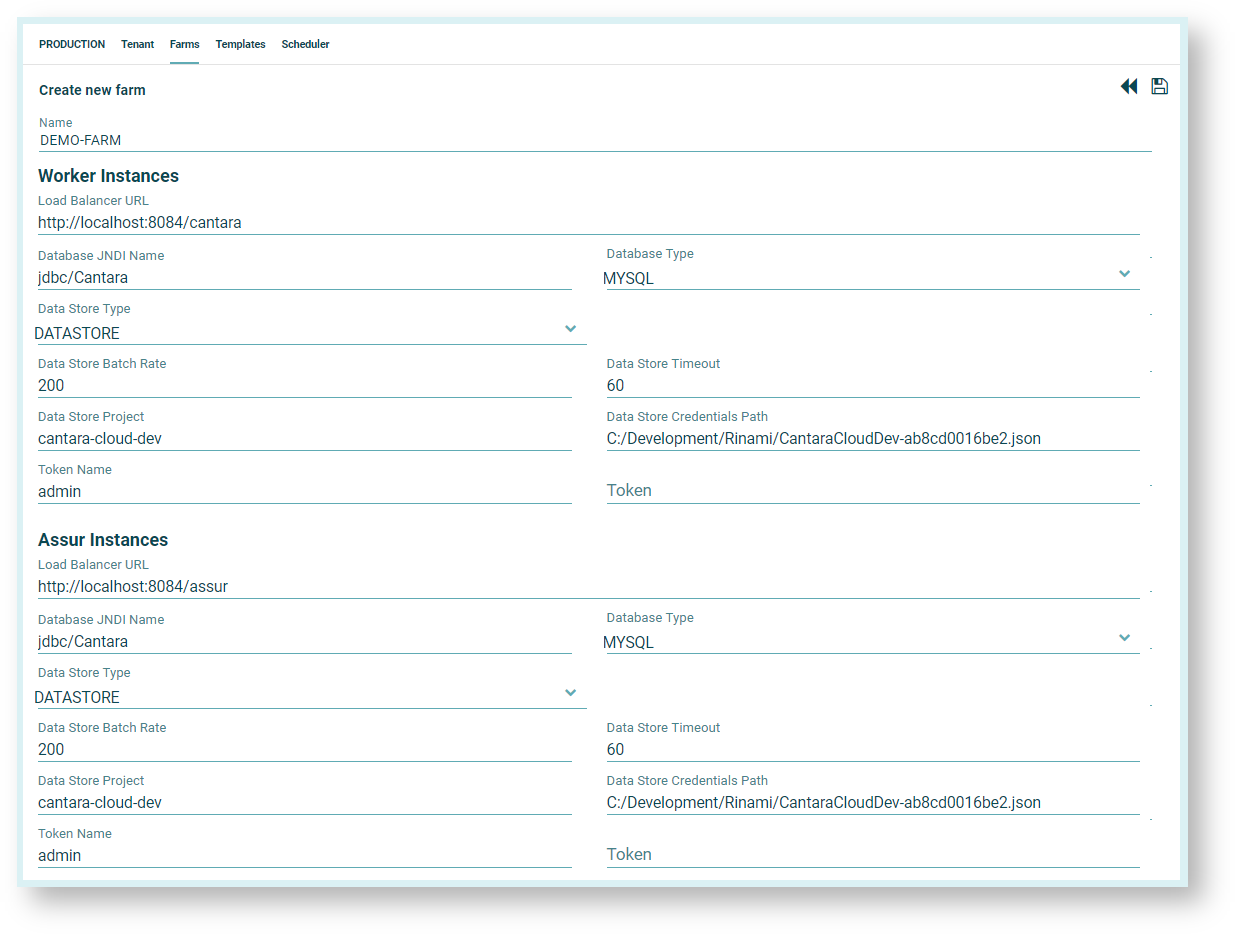
- Click the Save button.
- Next step is to configure your Assur Instance, once your Assur instance is configured you need to configure your Worker Instance.
On This Page