Adding a Worker Instance
On-Premises Installation Only
Make changes to the following as necessary:
- Name: The name you want to assign to the server. The value for this field can be a maximum of 12 characters (no spaces). Valid characters include numbers, letters, and a dash (-).
- End Point: The URL for the Cantara Access Server, including the root context
- Session Timeout: The amount of time in minutes from when a user session expires
- Cache Timeout: The amount of time in minutes from when the cache expires
- Assur Connection Pool Properties:
- Agent Connection Pool Properties:
- Log Level: The level of information you want to capture. See Log Level Reference.
- Log Path: Path to the log file
- Measurement Scheduling: (Cantara internal tasks to populate graph details etc.)
- Autostart: Checking this option causes the the scheduler to automatically start when your Cantara server starts. If you do not check this option, the scheduler remains in a SUSPENDED state. As a best practice, leave this option unchecked to make the scheduler only starts when the JD Edwards server is running.
- Threads: The maximum number of jobs the system can submit and monitor simultaneously on the server. The default is 10. You are free to set the maximum that best suits your needs. However, if you want to specify more than 50, it is recommended that you opt for clustered scheduling that spreads the work across multiple servers.
- Misfire Threshold: The amount of time (in seconds) in the past that the scheduler will trigger a job. For example, if you turn on the scheduler and this value is set to 60, any jobs that were supposed to start in the past 60 seconds will automatically start. As a best practice, specify a value that is 5 to 60.
- Tenants Scheduling: (Used by the Job Scheduler and Route monitoring)
- Autostart: Checking this option causes the the scheduler to automatically start when your Cantara server starts. If you do not check this option, the scheduler remains in a SUSPENDED state. As a best practice, leave this option unchecked to make the scheduler only starts when the JD Edwards server is running.
- Threads: The maximum number of jobs the system can submit and monitor simultaneously on the server. The default is 10. You are free to set the maximum that best suits your needs. However, if you want to specify more than 50, it is recommended that you opt for clustered scheduling that spreads the work across multiple servers.
Note when setting this value, if an additional job is queued to be run above the maximum number of threads this additional job will only be queued for the amount of time that is set in the Misfire Threshold below.
- Misfire Threshold: The amount of time (in seconds) in the past that the scheduler will trigger a job. For example, if you turn on the scheduler and this value is set to 60, any jobs that were supposed to start in the past 60 seconds will automatically start. As a best practice, specify a value that is 5 to 60.
- Clustered Scheduler: Activates job scheduling across multiple workers. This option must be checked if your setup consists of more than one worker.
- Mail JNDI Name: JNDI name to use if you want to receive notifications. This JNDI reference is set up with your web server.
- Mail From Address: Email address that emails will come from on the server if you want to receive notifications.
- Scheduler Monitoring (Enterprise Only): How frequent (in seconds) the system will poll JD Edwards jobs to check their state. The recommendation is 15. The lower the value, the more times the JD Edwards system is polled. However, the scheduler will be more accurate in terms of when jobs start and finish.
- Push Notifications (Enterprise Only): If you wish to use push notifications the below items are required
- FCM URL: Your Google Firebase Cloud Messaging URL
- Monitor Interval: How often should Cantara poll JDE for new push notifications in seconds
- JDE Username: Generic username for the user that will be used to login to JDE to check for unprocessed push notifications
- JDE Password: Password for the generic user
- Proxy Server: If your internal networking is behind a proxy network, your proxy servers details will need to be added below
- Hostname: Proxy server hostname
- Port: Proxy server port
- Username: Proxy user
- Password: Proxy user's password
- Timeout Settings: Allowed Min/Max range that is allowed to be set within the Tenant setup screen.
- Functions
- Queries
- Reports
- Routes
- Extenstions
- Media
- Login
- Report Monitor
- JDE Client Timeout: This is the amount of time that Cantara will wait for a JDE response. 600000 milliseconds is an appropriate value.
Log Level Reference
Log Level | Description |
|---|---|
| ALL | Logs all operations of the access server. This creates significant logs and should only be used when troubleshooting issues. |
| TRACE | Logs almost all operations of the access server. This creates significant logs and should only be used when troubleshooting issues. |
| DEBUG | Logs debugging information for the access server. Should only be used on non production servers. |
| INFO | Logs information that assists with configuration and performance tuning. Can be used on production servers. |
| WARN | Logs all errors and warnings. Recommended for new production installations. |
| ERROR | Logs all errors generated by the access server. Recommended minimum level for production servers. |
| FATAL | Logs only errors that would have caused the access server to stop processing requests. Only recommended for production servers in a mature environment. |
| OFF | No logging. Not recommended. |
To add a Worker
- Select the Farm node in the navigation panel.
- Click the 1st Tab displaying the name of your current farm.
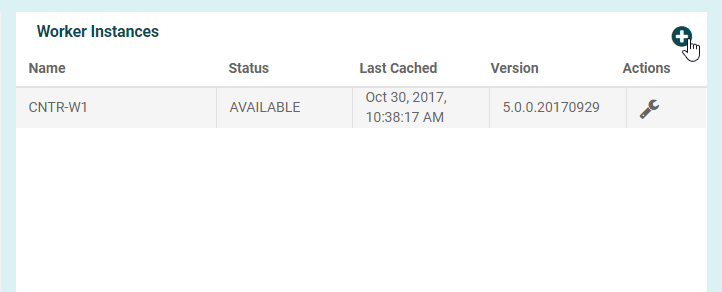
- Click the Add button in the top right of the Worker Instances section
- The new Worker details will populate based on the template setting for workers.
- Modify details as required, for the server that has been setup.
- Press Save.
On This Page