Configuring an Application for Push Notifications with Firebase
Cantara provides Push Notifications to your Cantara mobile app or web application, using the Firebase cloud messaging service.
The following information describes the message flows and explains how to configure push notifications.
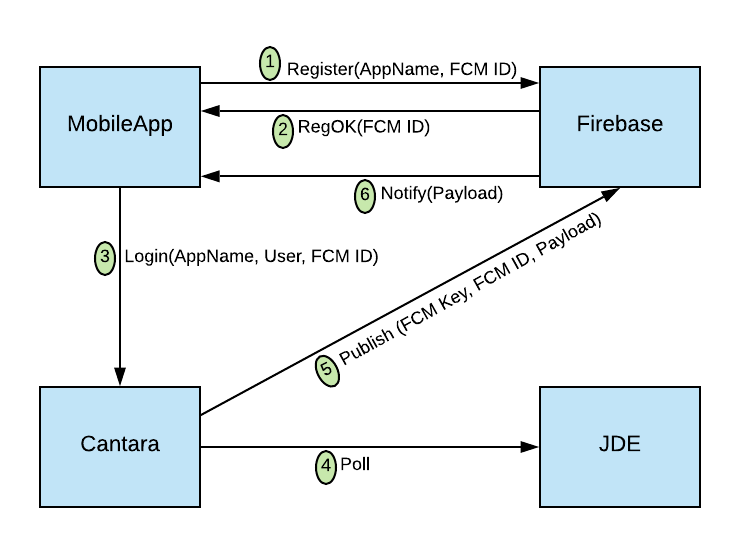
Push Notification Message Flow
Step | Action | Description |
|---|---|---|
1 | Register | The mobile application registers with the Firebase server. |
2 | RegOK | The Firebase reply includes a unique ID for the app & device. |
3 | Login | The mobile application logs into Cantara. |
4 | Poll | Cantara polls the FQ35CA01 table on the JDE server for notification messages, at a configured monitoring interval. |
5 | Publish | Cantara publishes a payload to Firebase. |
6 | Notify | Firebase sends a push notification to the mobile application. |
Configuration Steps
To enable push notifications using Firebase cloud messaging, the following configuration steps are required:
Configuring an Application for Push Notifications with Firebase#Creating a Firebase Account
Configuring an Application for Push Notifications with Firebase#Creating a Firebase Project
Configuring an Application for Push Notifications with Firebase#Using the Firebase app SDK
Configuring an Application for Push Notifications with Firebase#Additional Steps required for iOS
Configuring an Application for Push Notifications with Firebase#Configuring your Cantara Environment for Push Notifications
Configuring an Application for Push Notifications with Firebase#Configuring your Cantara Application with a Firebase Key
Creating a Cantara Push Notification
Each of these steps is described in detail below.
Creating a Firebase Account
To create a Firebase Account
Refer to the Firebase website for details on setting up an account and obtaining a Firebase Key.
Creating a Firebase Project
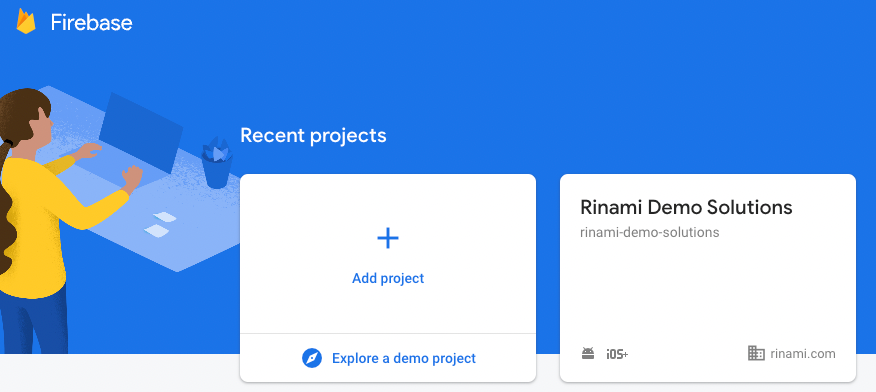
Once you are logged into the Firebase website, you can select an existing Firebase project, or create a new one.
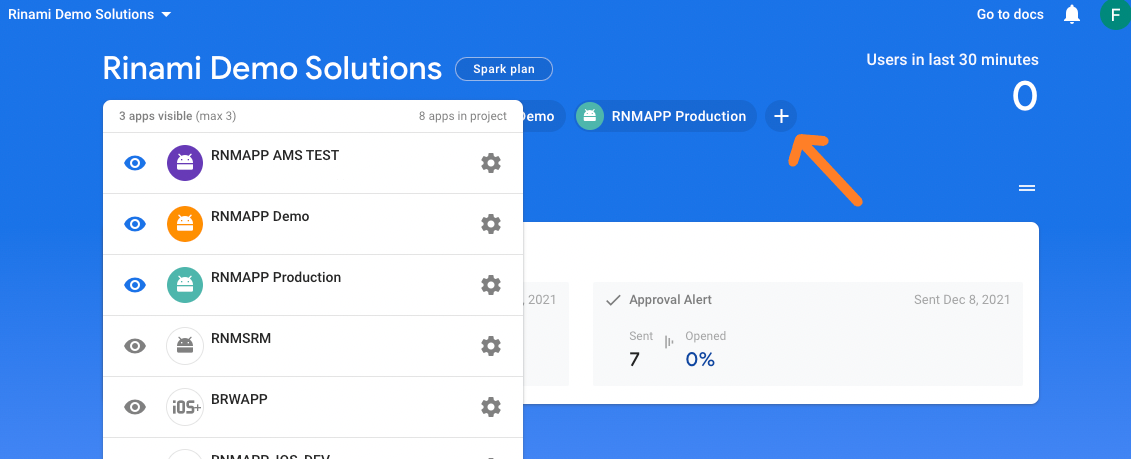
A Firebase project defines a group of Firebase 'apps'. Whilst there are no rules about how apps should be grouped, a project typically includes apps with similar functionality. So for example, a 'Storeroom' project may be configured to contain 3 apps: an iOS Storeroom app, an Android Storeroom app, and a web application Storeroom app. A separate Firebase project may contain the Approvals apps, one for each target platform.
To create a Firebase project
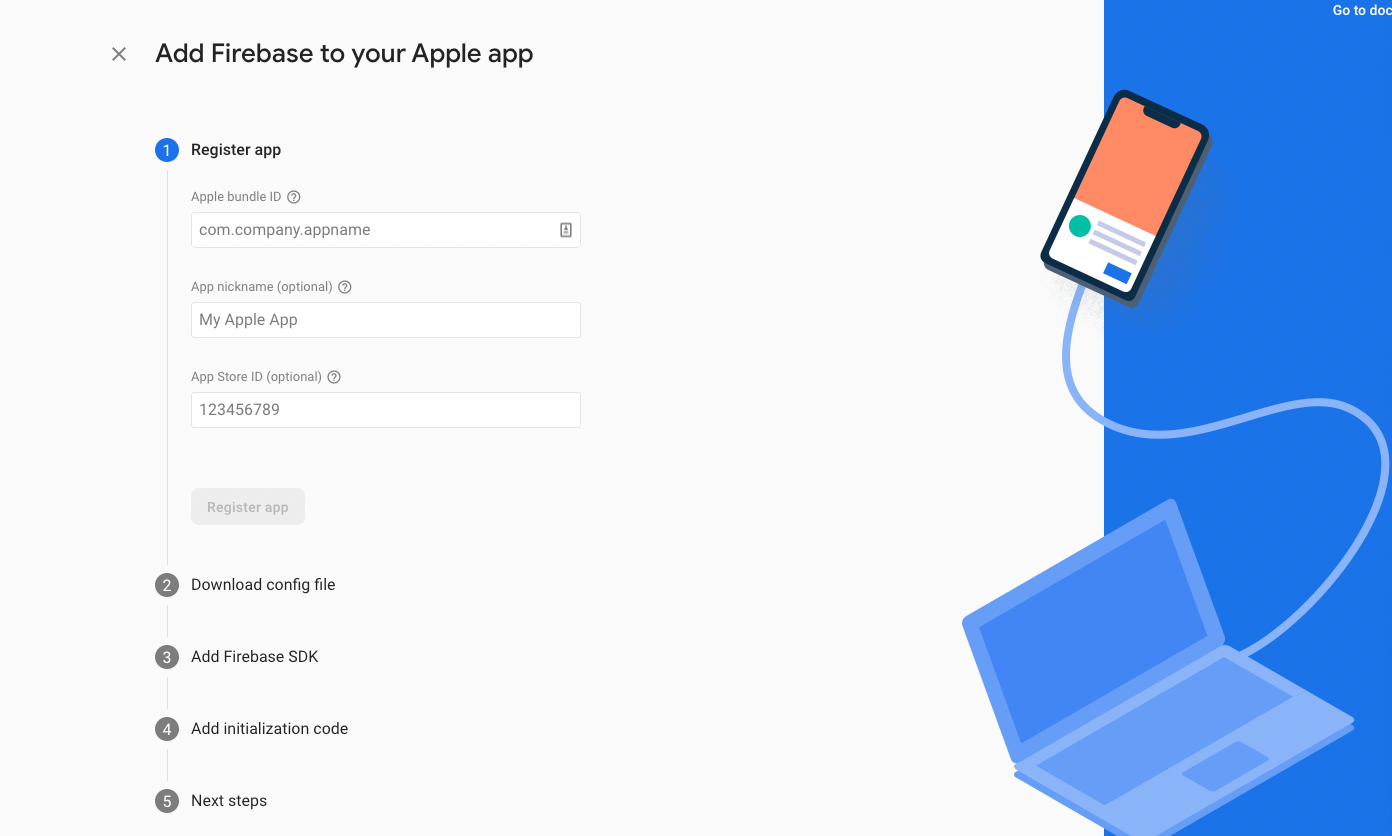
To create a Firebase app within the project
Follow the platform-specific steps to configure your app.
To obtain the Firebase 'key' for the project
The Firebase key will be required for configuration of Cantara push notifications.

Using the Firebase app SDK
Each Firebase 'app' in the project includes an SDK, which should be downloaded. The SDK contains code that must be integrated with the Rinami app source code.
The SDK also includes the firebase configuration file, and instructions for developers to follow.
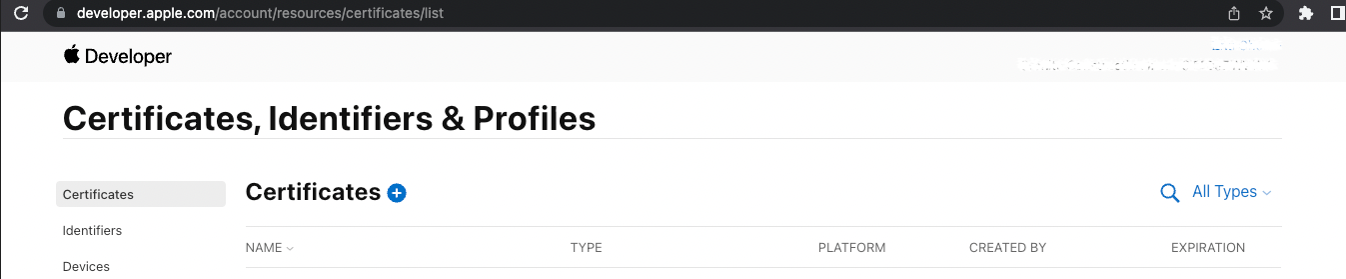
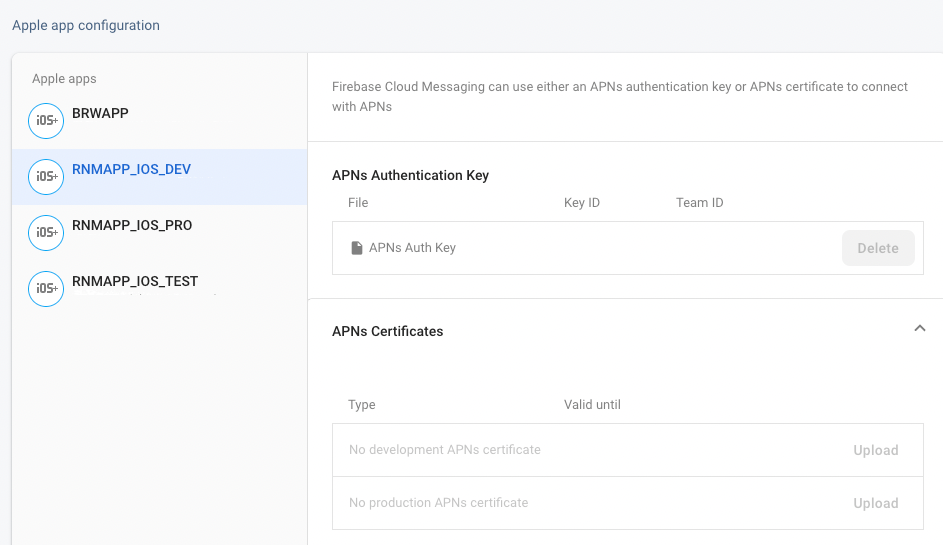
Additional Steps required for iOS
For iOS notifications, Firebase needs to be configured with additional information so that push notifications can be forwarded to Apple.
An Apple Developer account and either an Apple key or certificate is required to authenticate Firebase.
Configuring your Cantara Environment for Push Notifications
To add an Environment supporting Push Notifications:
Open the Components menu group in the navigation panel.
Select the Environments node. A list of the configured environments is displayed:
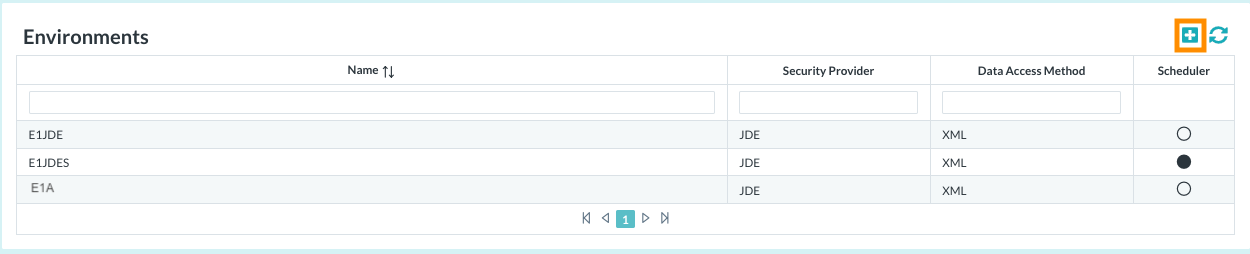
Click the Add button. The Add Environment screen is displayed.
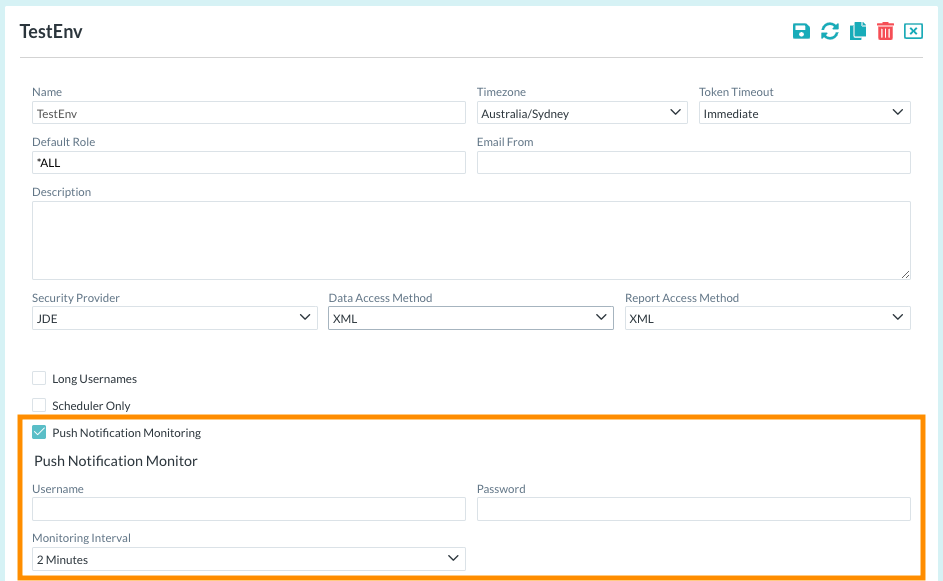
Select the Push Notification Monitoring option.
Enter the credentials for the JDE user account that will run the monitor.
Enter the required Monitoring Interval for Cantara to poll the JDE server.
Refer to Defining an Environment for further information about creating a Cantara environment.
Click the Save button to save your configuration changes.
Configuring your Cantara Application with a Firebase Key
To configure an Application Firebase Key
Open the Components menu group in the navigation panel., and select the Applications node.
Click Add to create a new application.
The application details screen will be displayed: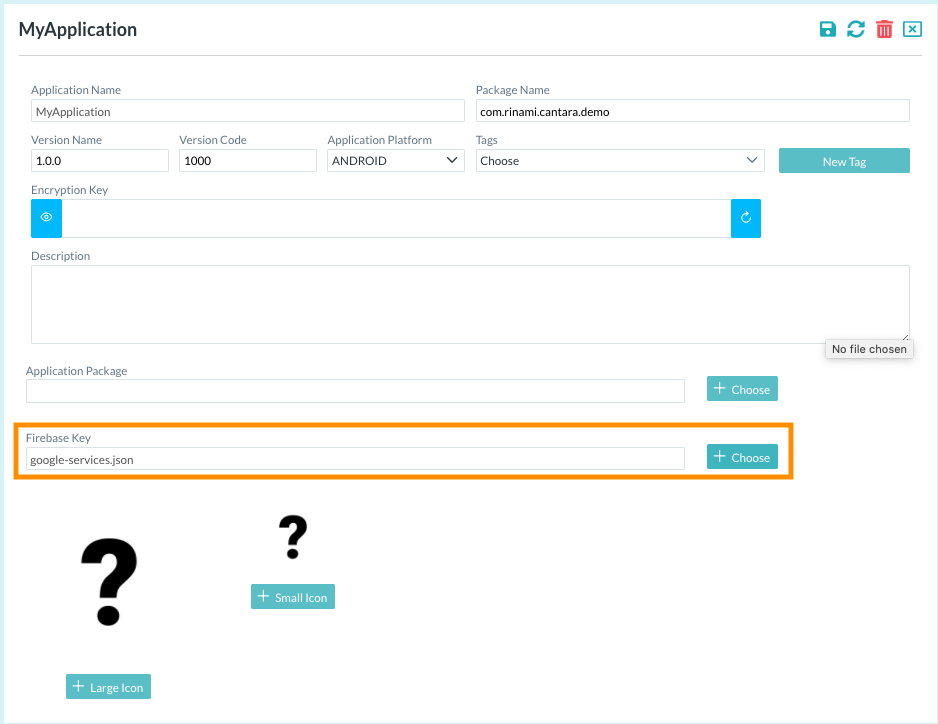
Enter the Application Name that you want to assign to the application definition.
The Application Name must be unique across all application platforms, and must be the name provided by the mobile application as a parameter to the Cantara login process. Refer to User Sessions for further information.
Enter the Firebase Key that you obtained from the Firebase website.
For further information about application configuration, refer to Creating an Application.
Click the Save button to save your configuration changes.
Creating a Cantara Push Notification
A Cantara Push Notification is only required if a push notification message needs to be sent to multiple applications, such as when an application is installed on multiple platforms (e.g. iOS, Android). The Push Notification enables you to configure the name of the application that is searched for in the JDE push notification messages table, and it also allows routing of messages to particular application(s).
To create a Push Notification
Open the Components menu group in the navigation panel, and select the Push Notifications node.
Click the Add button to create a new push notification.
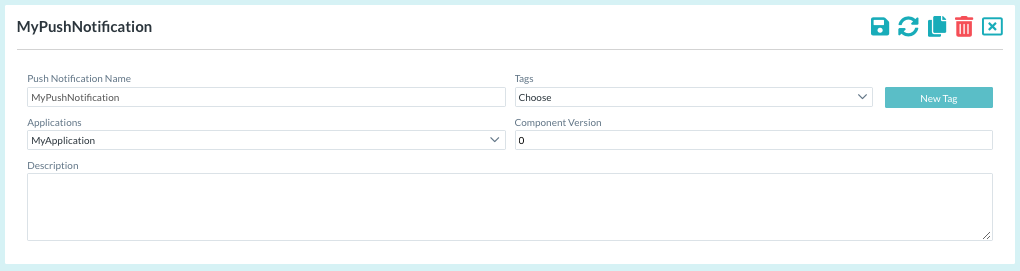
Enter the required Push Notification Name. This name will be used when searching the JDE push notifications messages table for entries containing a matching application description.
Use the Applications selection list to select the application(s) that should be notified. The Application name must be the name that the client mobile application or web page declares during the Cantara login process.
Click the Save button.
For further information about Push Notification configuration, refer to Managing Notifications.
Generating Notification Messages in JDE
New notification messages are generated using the JDE function Q35CreatePushNotification. This function may be invoked by a Cantara mobile app, web application, or scheduled report.