Farm Configuration
The information on this page applies to On-Premises deployments only.
To View or Update Farm Configuration
- Open the Farm menu group in the navigation panel.
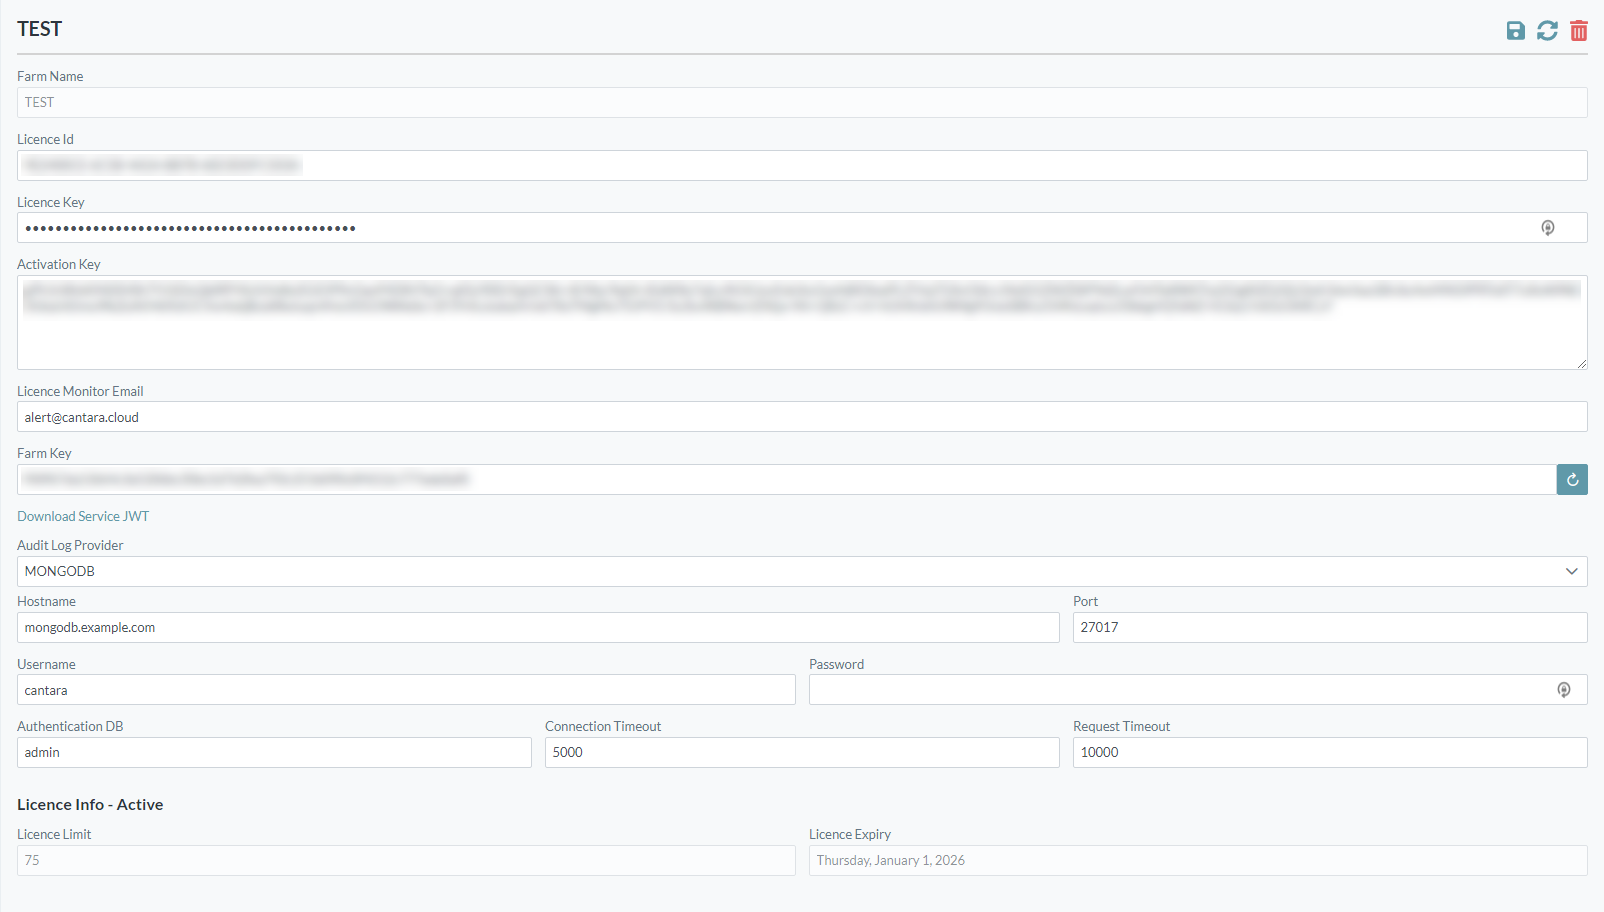
Select the Configuration node. The Farm Configuration screen is displayed:
- Select the required Farm from the selection list in the status bar (top of the screen).
- The following items may be configured:
- Farm Name (new farm creation only): The value for this field can be a maximum of 12 characters (no spaces). Valid characters include numbers, letters, underscore (_) and a dash (-).
- License ID and License Key: Cantara Integration Platform license details. After changes are saved, the corresponding activation key will be retrieved from the server and displayed. License allocation limit, current consumption and expiry details are also displayed.
- Activation Key: For on-premises deployments, the Activation Key may be edited directly.
- License Monitor Email: Enter an email address to receive notifications when the license limit or the expiry is being approached. NB: Further information about email setup can be found in Creating the Access Server Properties File.
- Farm Key: Enables communication between Cantara servers. By clicking the adjacent reset button, a new Farm Key is generated and distributed to Cantara servers.
- Download Service JWT: Click this button to obtain the JSON web token for the farm. The downloaded key can be used to call the Cantara Access Server configuration API.
- Audit Log Provider: A selection list of supported logging services. Depending on the provider chosen, additional configuration items are required, such as hostname, login and timeout settings.
- Save configuration changes by clicking the Save button in the upper right corner of the screen.
Adding a new Farm
To add a new Farm
- Open the Farm menu group in the navigation panel.
Select the Configuration node. The Farm Configuration screen is displayed.
- Select "Create Farm" from the selection list in the status bar (top of the screen).
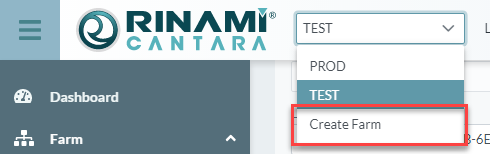
- The Add Farm screen is displayed. Enter the Farm name, license information and other settings.
- Click the Save button.
Deleting a Farm
To delete a Farm
Deleting a farm removes all associated data. This action cannot be undone.
- Use the Farm drop-down list in the status bar to select the Farm that is to be deleted.
- Open the Farm menu group in the navigation panel.
- Select the Configuration node.
- Verify that the Farm Configuration screen is displaying the Farm that is to be deleted.

- Click the Delete button.
- Confirm the delete operation.