Administration Console Configuration (On-Premises only)
Console Base Configuration
The first step to be executed after Cantara Console Installation is to complete the configuration of the administration screen.

To complete base configuration setup
- The configuration path is defined automatically. This file will contain the base configuration.
- The Session Timeout is the time (minutes) that a console user session will be maintained. If the user does not refresh or request a page within the time-out period, the session ends.
- The Tenant ID is the Rinami's Customer ID you can find this number on https://portal.cantara.cloud
- Database JNDI Name / Database Type are the configuration details needed by the Cantara Console to be able to connect with the database.
- Max Total, Max per Route, Connection Request Timeout, Connection Timeout and Socket Timeout are parameters related to the connectivity between Console and other Cantara components: Assur instances, Worker instances or Load Balancers.
- Click the Save Config button.
Create an Admin User
On initial setup, the Cantara Console is accessible with the default admin/admin username and password. To remove this and secure your Cantara installation, a new admin user account needs to be created.
After creating a farm, the User Management option will appear in the menu pane, navigate to this option and select "Add User":
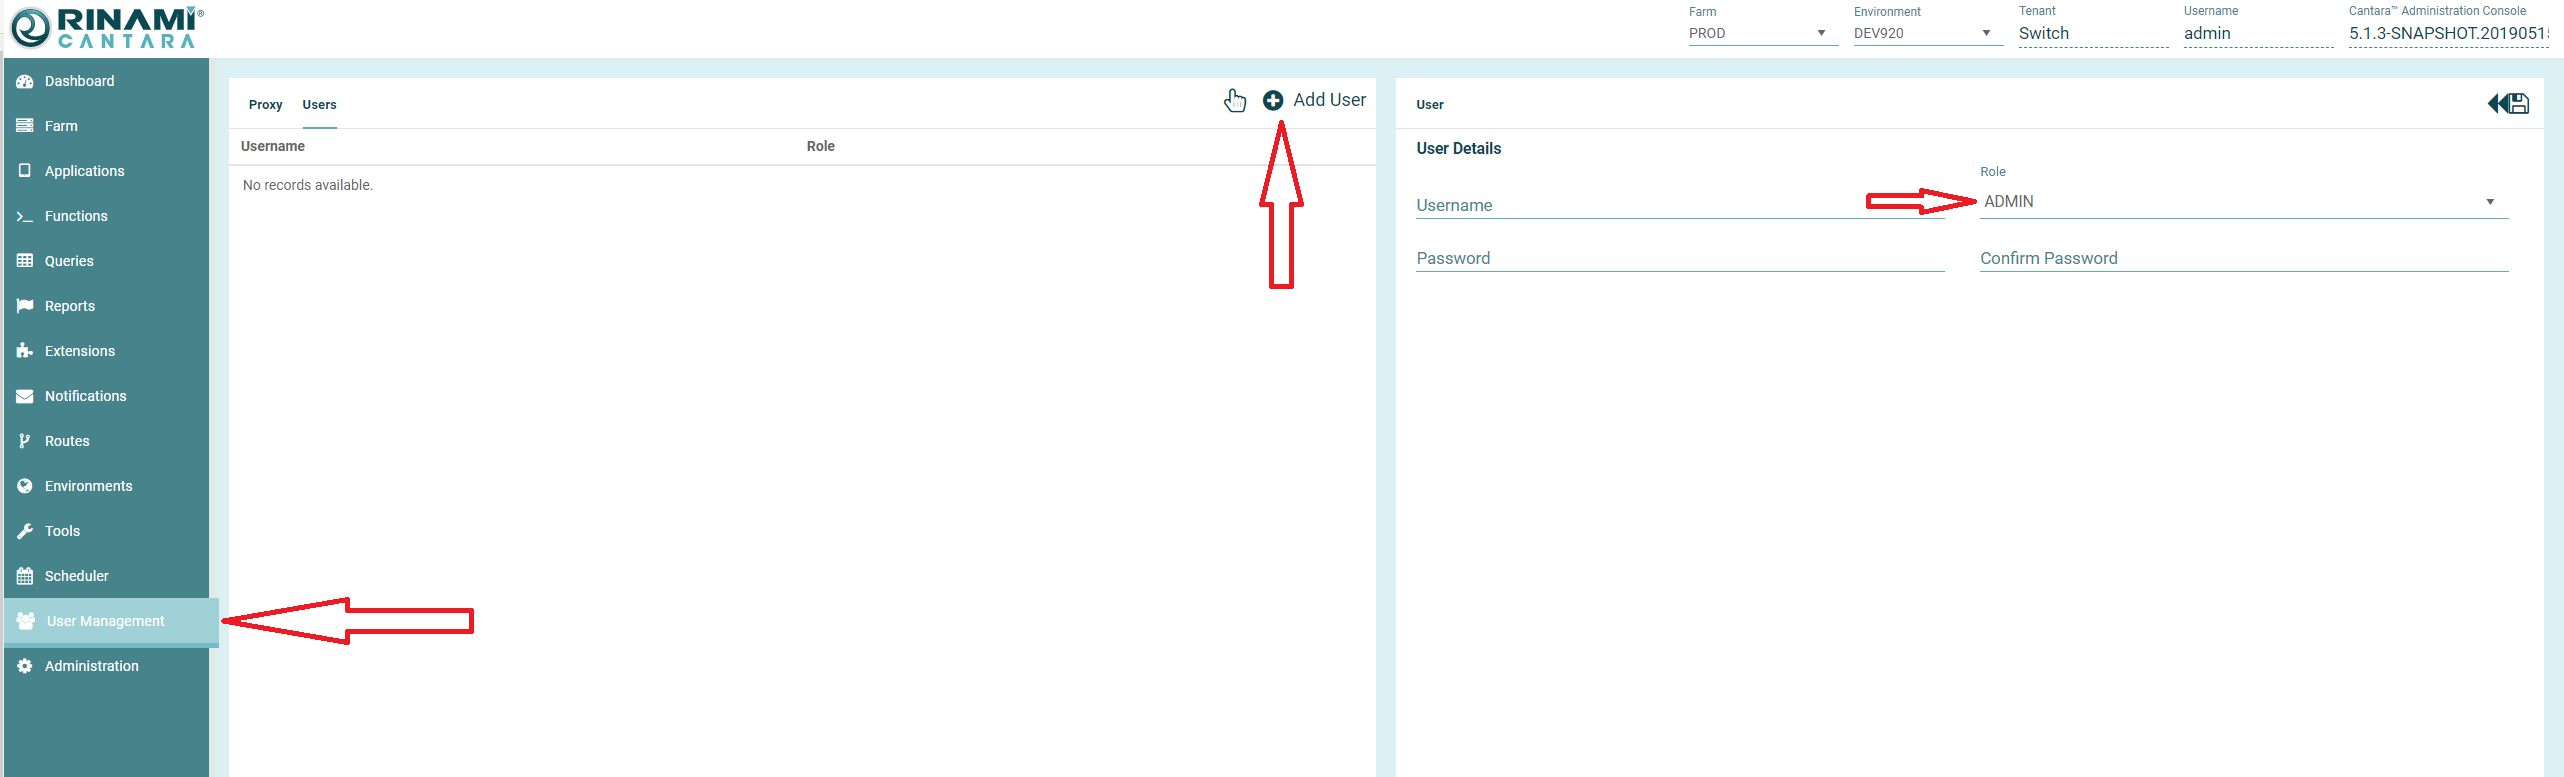
For your first user, ensure the Role is set to ADMIN. Enter your desired username and password and hit save.
Once the first admin user has been created, the default "admin/admin" login will be disabled.