Creating and Defining a Route
Route services are executed either through REST service calls or via email from a monitored IMAP folder.
Creating Routes
To create a route
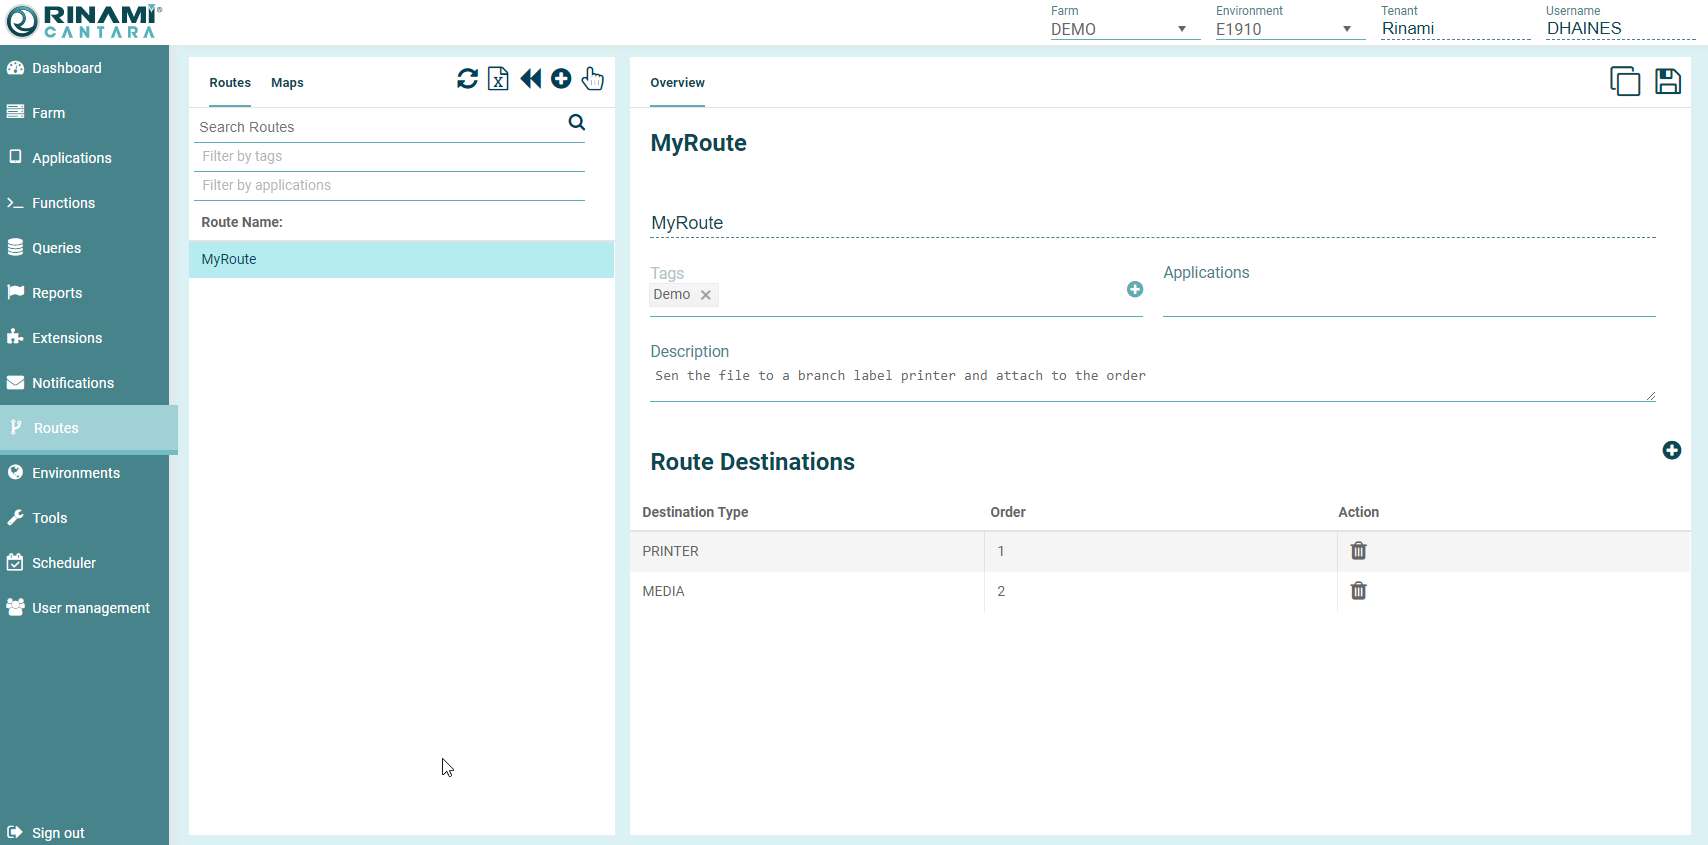
- Select the Routes node in the navigation panel. A list of available route services is displayed
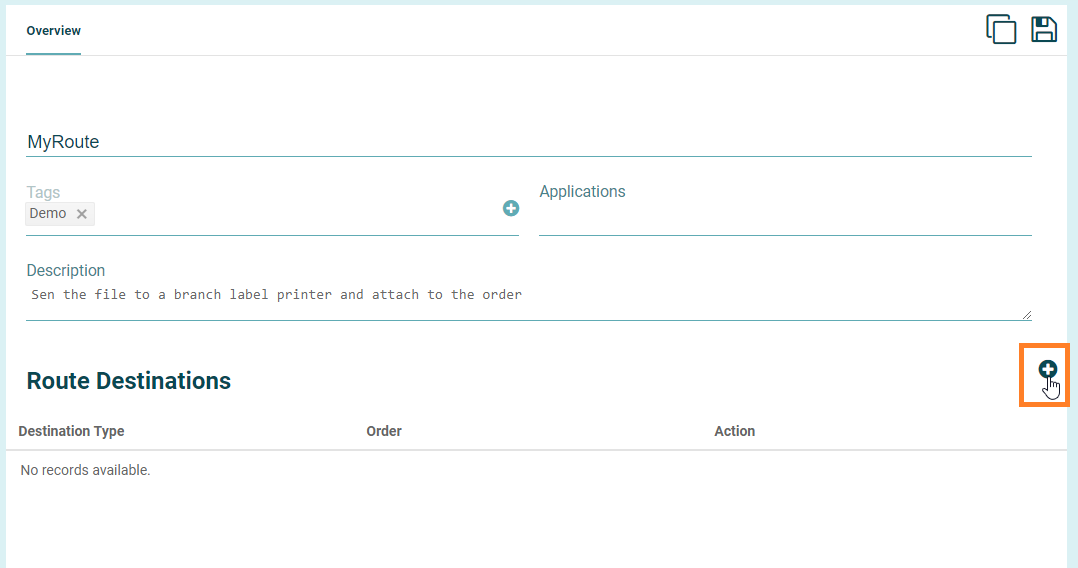
Click the Create button. The Create Route Service screen is displayed:

- Enter the following details:
- Name: The name you want to assign to the route. The value for this field can be a maximum of 40 characters (no spaces). Valid characters include numbers, letters, and a dash (-).
- Description: A description of the service definition for reference
- Click on the Create button to add a route destination to the route service. You will be prompted to select the appropriate type for the destination.
- Depending on the type of destination selected you will need to complete the appropriate elements.
- For each individual field you will need to define the source of the data. The options are:
- Direct means that the data for the field will either be provided by the destination definition from the Value field or from a parameter in the route request.
- Map means that the data for the field will be sourced from a route map. Please see Creating and Defining a Map for details on how to define a map.
- For direct fields, the Value field will be the default value for the element. If a Parameter value is defined the Value will be used in the case where the parameter is not found in the route request. If the element is defined as an encrypted field, for example passwords, the content of this field will be encrypted by Cantara before being stored.
- The Parameter field defines the name of the parameter within the route request that will hold the value for this element.
- If the element value will be defined by a map, then the map to be utilised should be selected in the Map field. If a Parameter is defined then the value of the parameter will be used as the key for the lookup. Otherwise the Value field will be used as the map key.
- You can add as many destinations as required.
Click the Save button. The extension is added to the list of extensions available.
Route Destinations
File Storage Destinations
Cantara supports FTP, SFTP and SMB as transfer methods for file storage. The following fields are utilised by these methods:
- Path - the path must be provided and should be in the format <hostname>/<relative-path>/
- Port - for FTP and SFTP you can override the standard ports. If no value is provided then ports 21 and 22 will be used respectively.
- File Name - if you wish to override the file name you can provide a value. This field is optional.
- Username - the user account that has write access to the path. In the case of domain authentication the format would be <domain>/<username>
- Password - the password for the user account. If this is entered into the Value field it will be encrypted by Cantara. If you use a map then no encryption will be available.
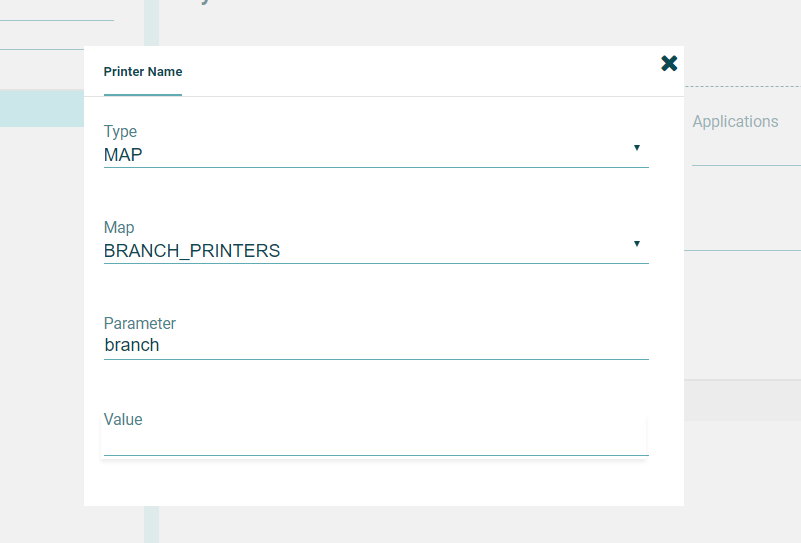
Printer Destinations
Cantara can send files directly to a printer that is available to the Cantara host. The file formats supported will be determined by the capabilities of the printer driver and printer selected. Common formats such as text, postscript, PDF and HTML are generally supported.
Printer Name - the local printer service name. When entering a Direct printer name, start typing the name of the printer into the value field, a list of locally available printers will be displayed.
Note
Printers must be locally installed on the server running the JDE agent.
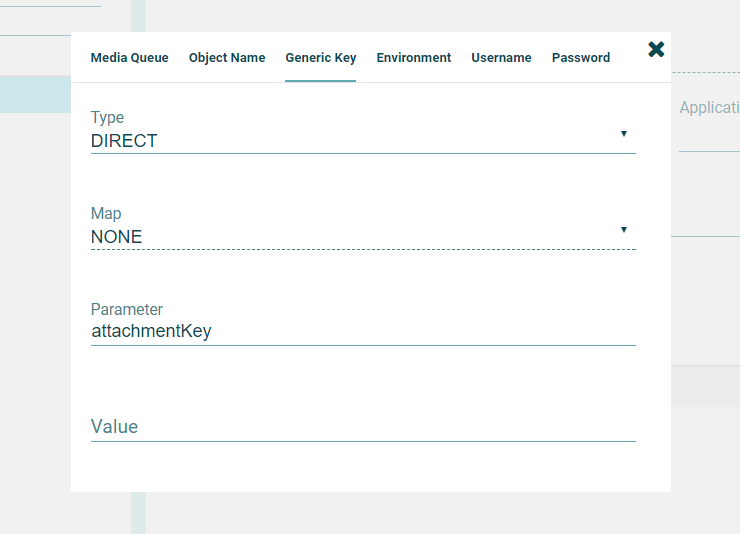
Media Object Destinations
You can choose to store the file in a defined media object queue and created the created media object attachment record within JD Edwards. This option is only available for environments that have media object access configured.
- Media Queue - The JD Edwards Media Object Queue to upload the file to.
- Object Name - The object name for the media object attachment record. This is the type of attachment to be stored.
- Generic Key - The generic text key for the media object attachment record. This is the record key for the attachment to be stored.
- Environment - The Cantara Environment to be utilised for file storage and attachment. Please refer to Defining an Environment to confirm setup.
- Username - The JD Edwards username associated with the selected Environment. This field is optional if the Environment has a default username defined otherwise it is required.
- Password - the password for the user account. If this is entered into the Value field it will be encrypted by Cantara. If you use a map then no encryption will be available.
Extension Destinations
Customers can choose to develop their own custom extensions for Cantara which support the transmission for file data along with metadata. This features enables custom file destinations to be developed as required.
- Extension Name - The configured Extension Service within the current Cantara instance.
- Request - The request payload to be passed to the extension service method. This should be in JSON format.
- Environment - The Cantara Environment to be passed to the extension service. This field is optional if the extension does not require environment information.
- Username - The JD Edwards username associated with the selected Environment. This field is optional if the Environment has a default username defined otherwise it is required.
- Password - the password for the user account. If this is entered into the Value field it will be encrypted by Cantara. If you use a map then no encryption will be available.
On This Page